Infrastructure Code
Table of contents
Outside of data analysis, there are a number of pieces of code that go into maintaining the project infrastructure.
ESMs
The following documentation is abstracted from here.
In order to trigger an ESM survey, you need to develop a plugin to AWARE. Plugins are pieces of software built to take advantage of the AWARE data stream features, where in this case, the plugin automatically sends a notification to the participant’s phone, asking them to fill out the survey in the app. The ESM design has many flexible options and configurations, so it’s worth talking about them here.
Installing an ESM Plugin
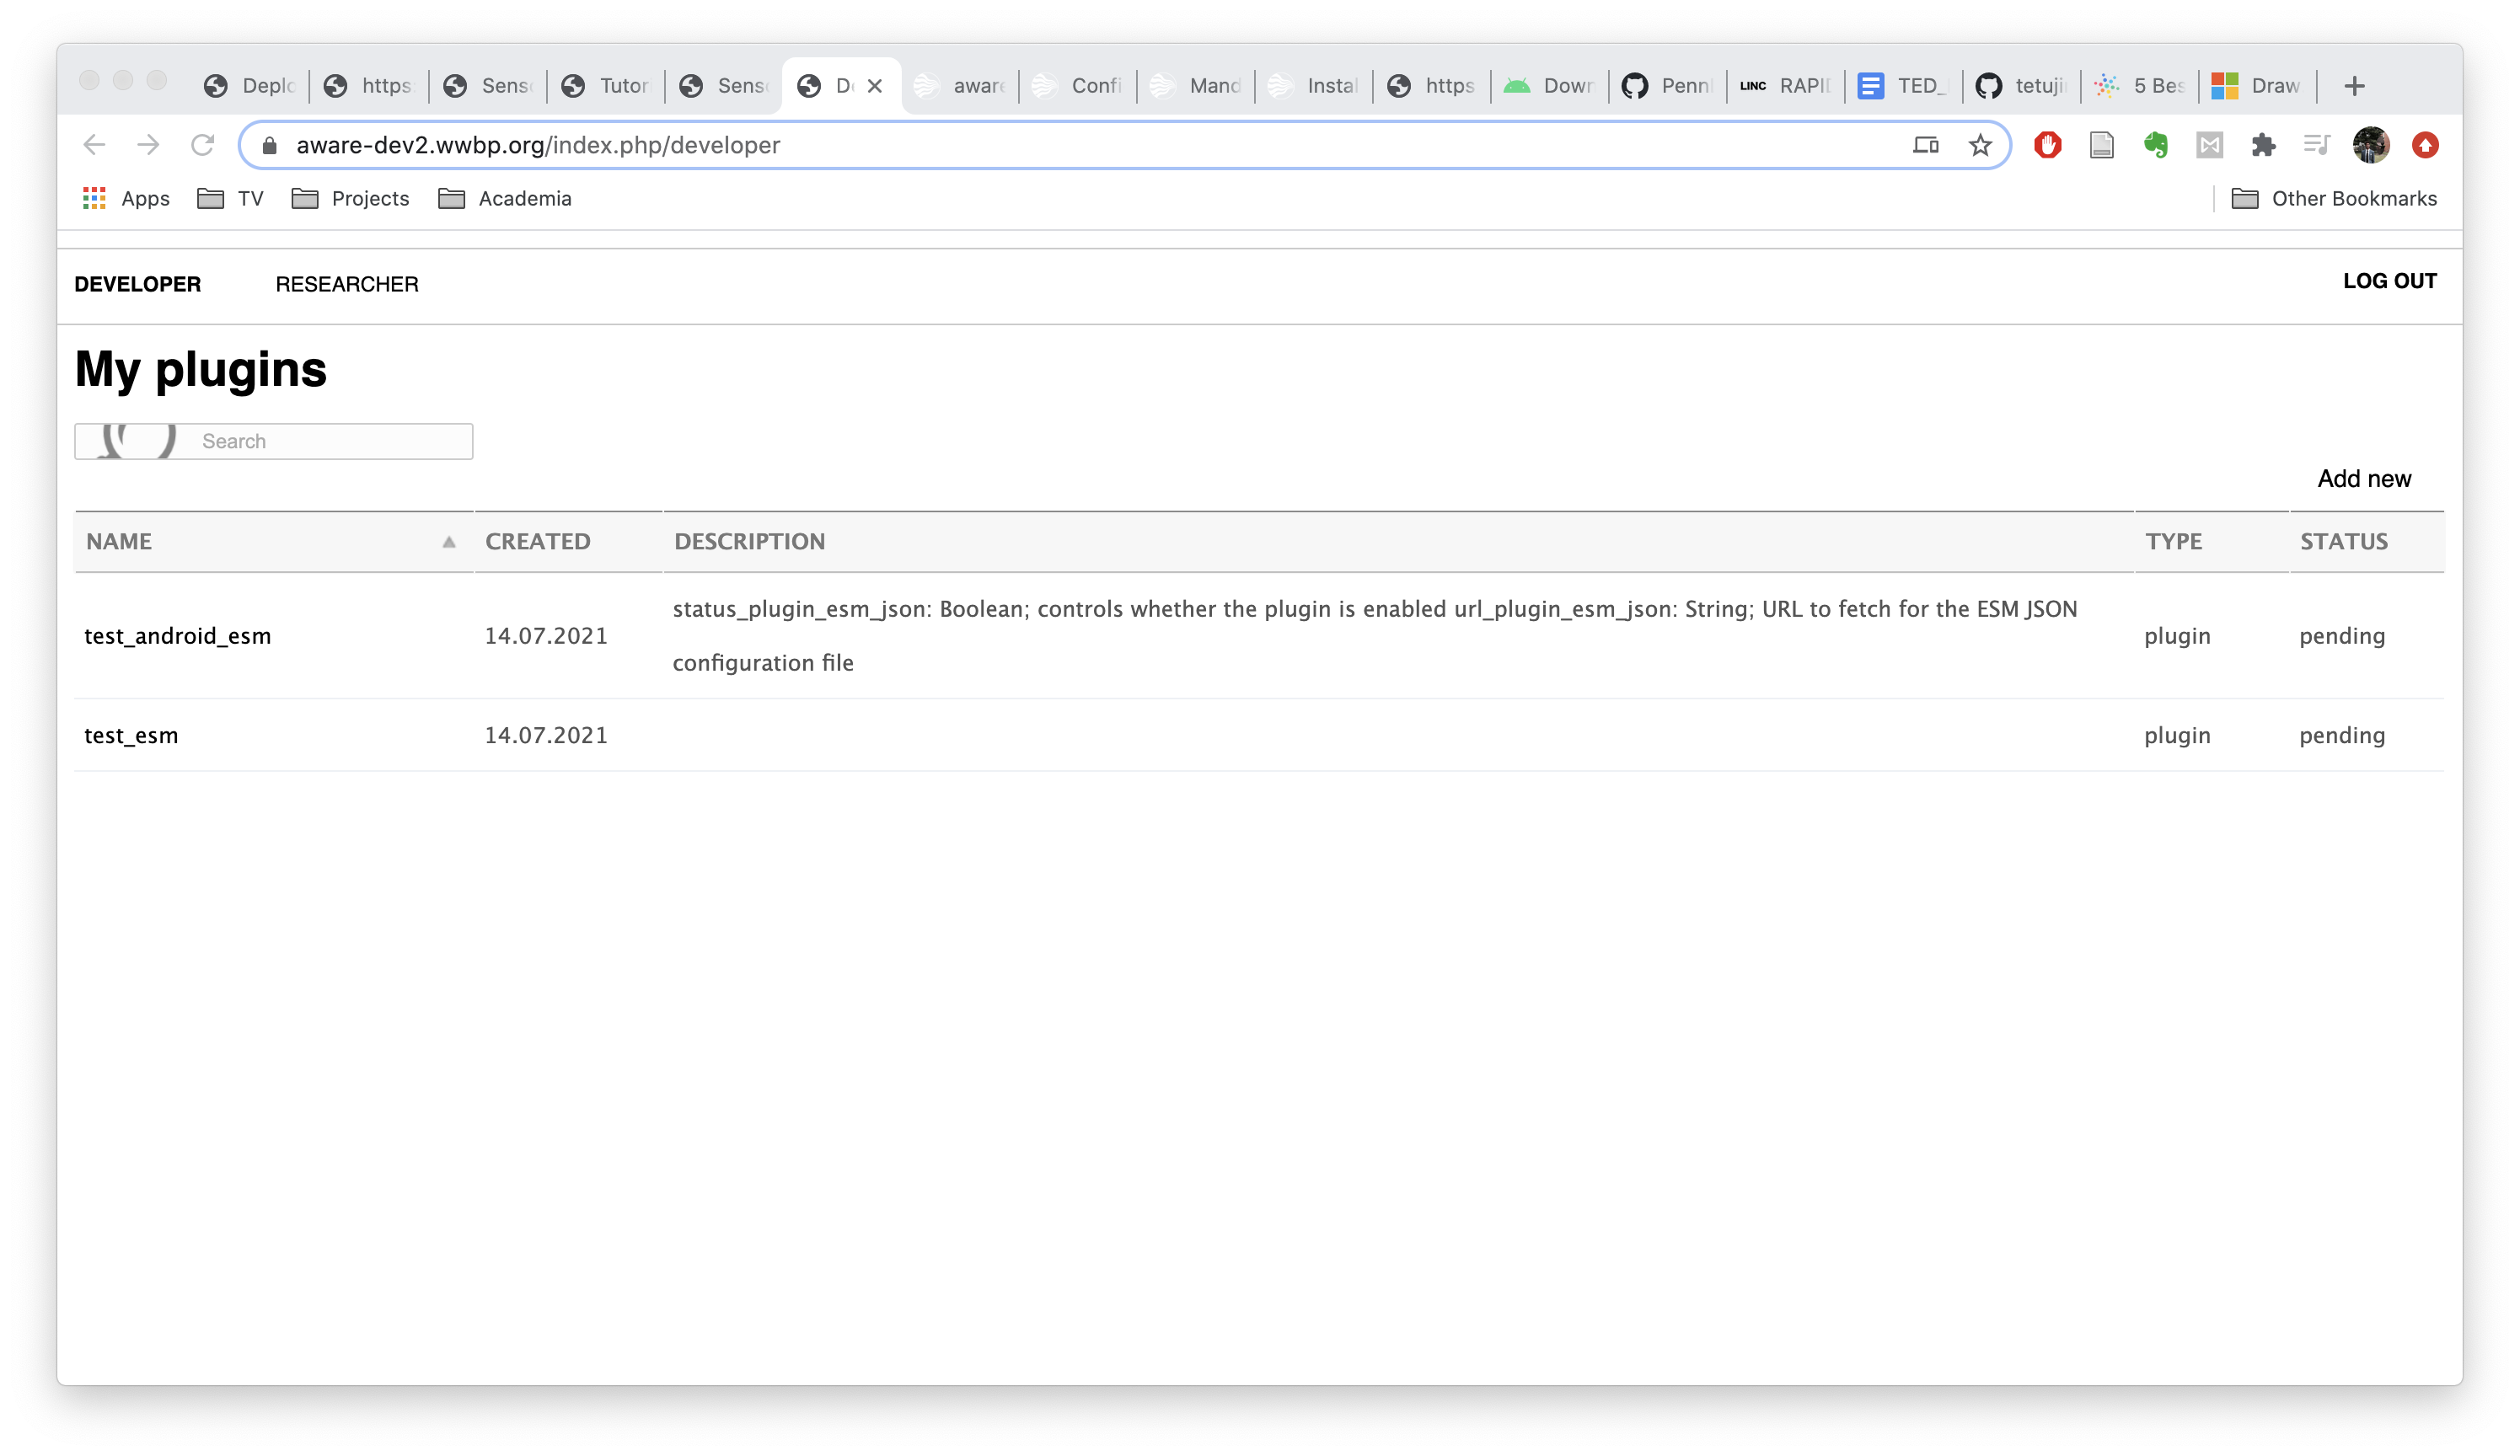
There are two separate ESM plugins you’d have to install, for iOS and for Android. To install an iOS ESM plugin, go to the Developer Page on the AWARE dashboard and click add new:
In the next page, give your plugin a (unique) name, and if desired, a description and icon. The important fields to fill in though, are at the bottom. In “Settings”, you must create two settings fields — these are what will populate in the Researcher Page when you try to add this plugin to your study.
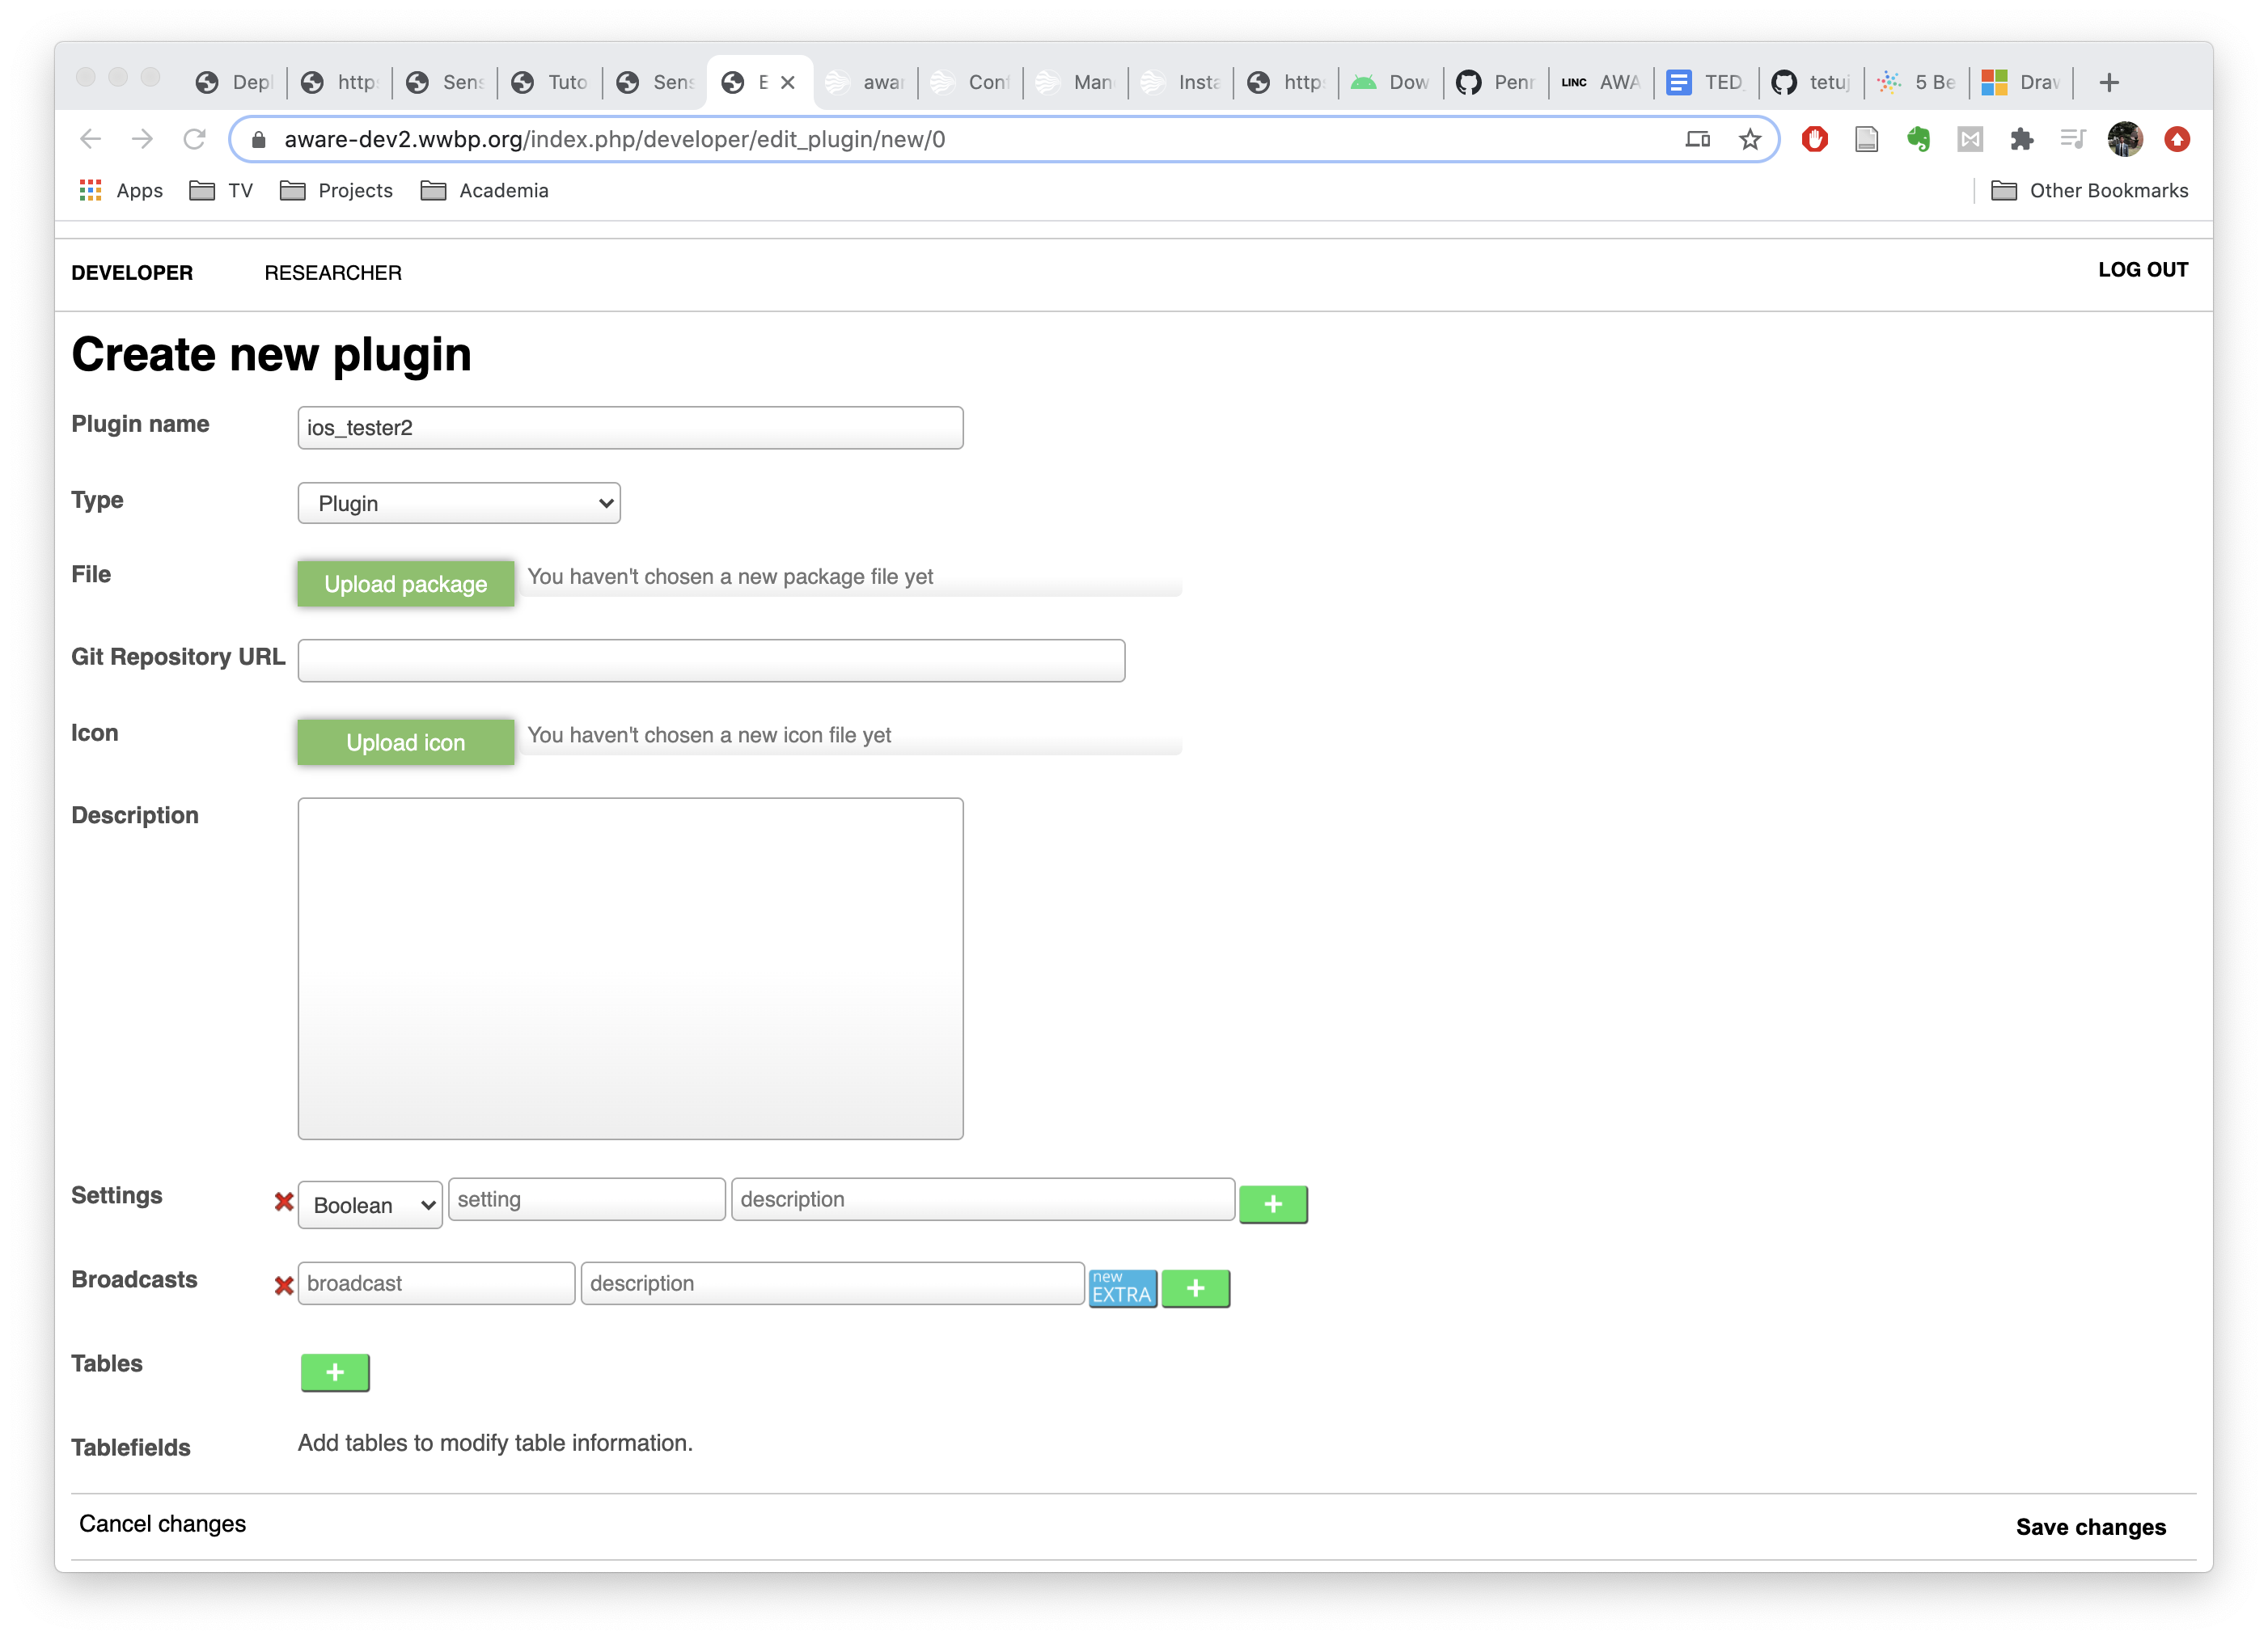
In short, you’ll need two fields — status_plugin_ios_esm and plugin_ios_esm_config_url. Set the first to boolean (meaning whether its on or off) and the second to text (meaning you can input the URL to the ESM config file, discussed below). You can be creative with the description fields, but it’s not necessary:

Go ahead and save that plugin (clicking Save Changes at the bottom of the page) and make sure to check “Make this plugin public”. Your plugin is not yet ready to use, though — first, you need to develop a config file.
Developing an ESM Config
The ESM config file is written in JSON, and specifies the way the user will interact with the survey and what data will be collected. There’s a lot of flexibility with the ESM, so the code for an ESM can be a lot to take in — let’s walk through it:
The first level of the JSON describes how and when the ESM presents to the participant. Below we’ve pasted an example with # comments for explanations:
    "schedule_id": "test schedule 1",    # string: A unique name for the scheduler
    "hours":[8,10,12,14,16],             # list with integers: The time on-the-hour in 24-hour notation for each survey to be triggered
    "start_date":"07-28-2021",           # date string: The start date of the surveys in MM-DD-YYYY format
    "end_date":"12-28-2024",             # date string: The end date of the surveys in MM-DD-YYYY format
    "expiration":45,                     # integer: The amount of time in minutes the participant has to fill out the survey
    "randomize":0,                       # integer: The amount of time in minutes to offset the survey notification (e.g. can appear 5 minutes before or after 8AM)
    "notification_title":"Survey",       # string: The title of the notification on the phone
    "notification_body":"Take a survey!",# string: The body of the notification on the phone
The above describes a survey that will be delivered every two hours from 8AM to 4PM, every day from July 28th 2021 until December 28th, 2024. Participants would have 45 minutes to fill it out from the time they receive a notification.
After this field, there must be one field called "esms", which is (finally) the list of actual survey questions. Each item in the list is itself an ESM JSON config. To accommodate for the different survey designs, AWARE has a number of options:
1. Free text
A text box for folks to input whatever they’d like
{
    "esm": {
        "esm_type":1,                     # integer: the type of survey question
        "esm_title":"Freetext",           # string: the title of the survey question users see
        "esm_trigger":"a context",        # string: these fields are used for context-dependant triggering of ESMS (currently unused)
        "esm_submit":"OK",                # string: the text on the button users will press to submit their response
        "esm_instructions":"Open-ended text input" # string: the subtitle of the textbox, which can be used to give instructions
    }
}
2. Radio
Radio buttons allow for single answer responses
{
    "esm": {
        "esm_type":2,                     # integer: the type of survey question
        "esm_radios":["Option 1","Option 2"], # list of strings: each item in the list corresponds to a choice
        "esm_title":"Pick One",           # string: the title of the survey question users see
        "esm_instructions":"Pick an option below", # string: instructions to the user
        "esm_submit":"OK"                 # string: the text on the button users will press to submit their response
    }
}
3. Checkbox
Checkbox answers allow for multiple choices to be selected
{
    "esm":{
        "esm_type":3,
        "esm_checkboxes":["Option 1","Option 2","Other"],
        "esm_title":"Checkbox",
        "esm_submit":"OK",
        "esm_instructions":"Multiple choice is allowed"
    }
}
4. Likert scale
Likert questions are available on a 5-point or 7-point scale, with increments of 1 or 0.5
{
    "esm":{
        "esm_type":4,                     # integer: survey type
        "esm_likert_max":5,               # integer: the max of the scale (must be 5 or 7)
        "esm_likert_max_label":"Great",   # string: the label for the maximum option
        "esm_likert_min_label":"Poor",    # string: the label for the mimimum
        "esm_likert_step":1,              # integer: the increment option (must be 1 or 0.5)
        "esm_title":"Likert",             # string: the title of the survey question users see
        "esm_instructions":"Rate X",      # string: instructions to the user
        "esm_submit":"OK"                 # string: the text on the button users will press to submit their response
    }
}
5. Quick response
You can use this field to display an array of buttons that the user can only pick one from, such as an answer to “did you enjoy this survey? Yes or No”
{
    "esm":{
        "esm_type":5,
        "esm_quick_answers":["Yes","No"],       # list of strings: the button labels users can pick from
        "esm_instructions":"Did you enjoy?",    # string: instructions to the user
        "esm_title":"Quick answer",             # string: the title of the survey question users see
    }
}
6. Scale
A scale can be used like the Likert but allowing fine-grain numeric responses using a slider
{
    "esm":{
        "esm_type":6,
        "esm_scale_max":100,                   # integer: the maximum value of the scale
        "esm_scale_min":0,                     # integer: the minimum value of the scale
        "esm_scale_start":50,                  # integer: the default value the slider will start on
        "esm_scale_max_label":"Perfect",       # string: the label of the max value
        "esm_scale_min_label":"Poor",          # string: the label of the min value
        "esm_scale_step":10,                   # integer: the interval between values that the slider will move
        "esm_title":"Scale",
        "esm_instructions":"Scale ESM",
        "esm_submit":"OK"
    }
}
9. Numeric
This can be used to enter a numeric value (including decimals).
NOTE: We jumped from ESM type 6 to type 9 – don’t ask me why, I am not an AWARE dev.
{
    "esm":{
        "esm_type":9,                        # integer: ATTN this should be 9
        "esm_title":"What's Your Age?",
        "esm_instructions":"How old are you",
        "esm_submit":"OK"
    }
}
10. Web
You can use this to open an embedded browser window (for example to fill out google form without leaving the app).
{
    "esm":{
        "esm_type":10,
        "esm_title":"ESM Web",
        "esm_instructions":"Please fill out this online survey. Press OK when done.",
        "esm_submit":"OK",
        "esm_url":"https://www.google.com"   # string: the URL the embedded browser opens
    }
}
Questionnaire Flow
You can chain ESMs in different ways to create a flow of questions (e.g. if the user answers “Yes”, go to sub-question A; otherwise go to sub-question B). You can do this with the "esm_flows" field, which is a list of the form:
"esm_flows": [                                # define the flow here as a list of dictionaries
    {                                         # each dictionary must have "user_answer" as corresponding to the
                                              # last answered question, and the "next_esm"
        "user_answer": "Yes",
        "next_esm": {
            "esm": {                          # one esm object


                "ESM DATA IN HERE"


            }
        },
    },

    {
        "user_answer": "No",
        "next_esm": {
            "esm": {


                "ESM DATA IN HERE"


            }

        }
    }
]
Putting It Together
There’s an example of a full ESM here.
Once you’ve developed an ESM config, simply upload it to Github (or some other service that allows you to share raw text), and then, using the “Raw” button in Github, copy the URL to the raw text. Go to the “Researcher” page in AWARE, and edit sampling to pull up your plugins. Scroll down to your plugin, check the status box to turn it on, and in the field Plugin ios esm config url, paste in the URL to your ESM config. Make sure to save your changes and reload the page (and notify any participants to re-sync their study).