Pre-visit procedures
EPIC Order/Generating an MRN on PennChart
-
Search for research participant using: MRN or Full Name and Date of Birth. If they do not already exist in PennChart system, click “New” and fill out “Demographics” page with their address and emergency contact

-
Enter study code (IRB Number) or RBN in “Research Studies” search bar. Press enter, or click the green plus sign to “add.”

-
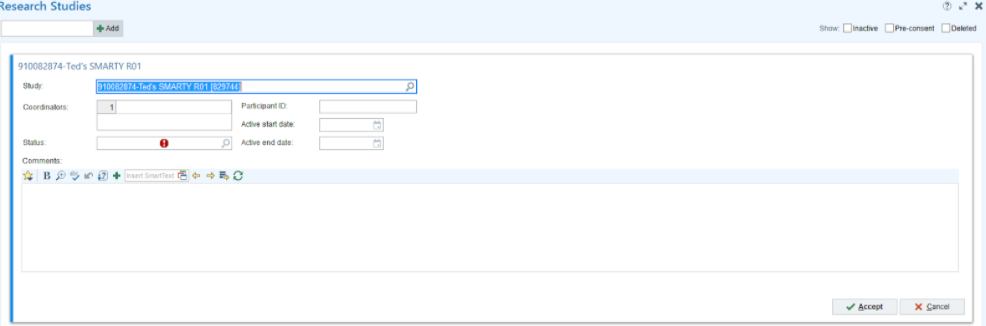
In the participant information page:
- Mark status as “Consented/Enrolled” (1060)
- Leave coordinator field and participant ID field blank
- Enter the participant’s scheduled visit date in both start and end date fields. Note: this will allow you to avoid all non-study charges being sent to your queue for billing review, only charges that may be associated with your study
- Click accept
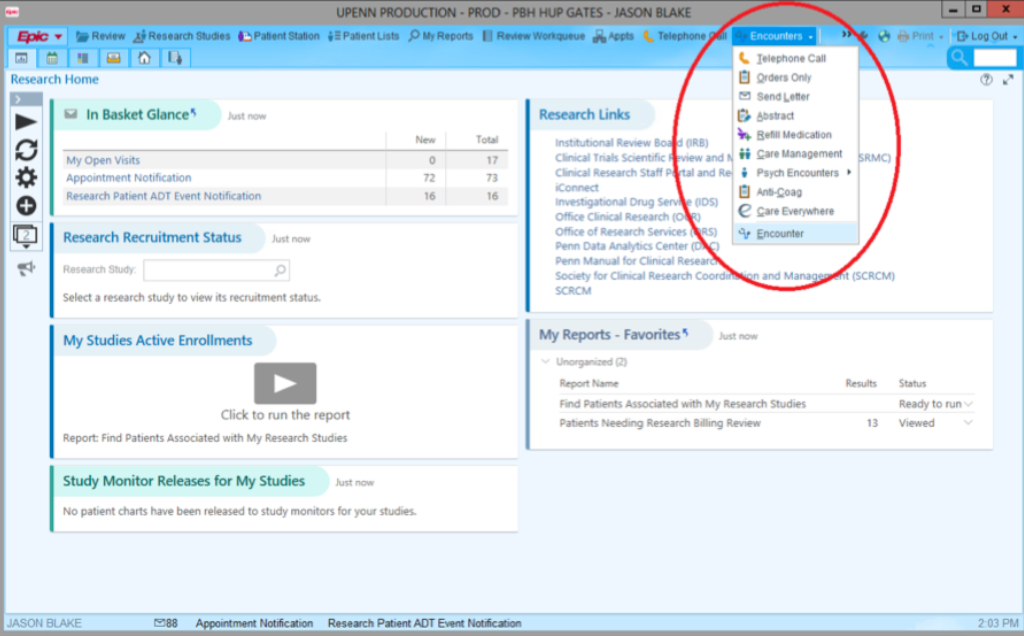
Creating MRI Encounter and Associating a Research Study:
-
Click Encounters in top menu bar, and select Encounter from dropdown menu.
-
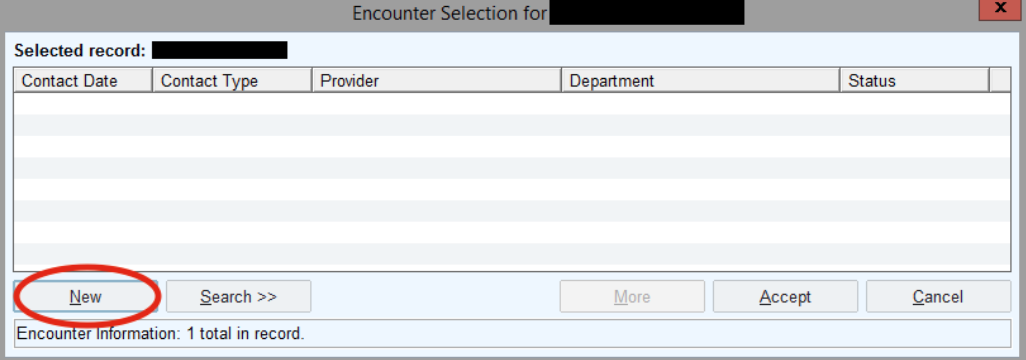
Type “=” to auto-populate information from most recent patient search, or select from Open Patients section at the bottom of the popup.

-
Click New within patient encounter record.
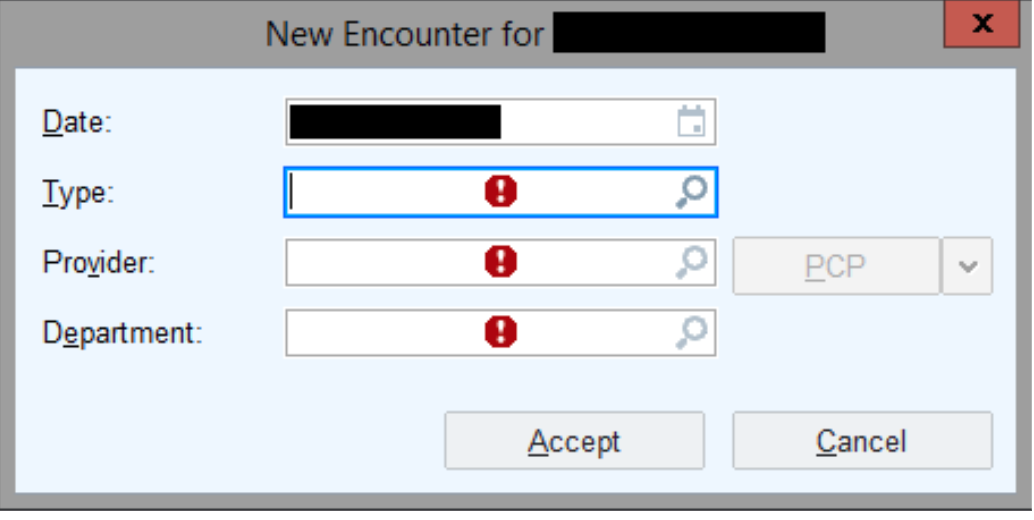
- Within the New Encounter popup, enter the following information:
- Type= research noncharable
- Provider= your PI or relevant MD
- Ted Satterthwaite
- Dan Wolf
- Christian Kohler
- Raquel Gur
- Department= 423 (PBH HUP Gates)
-
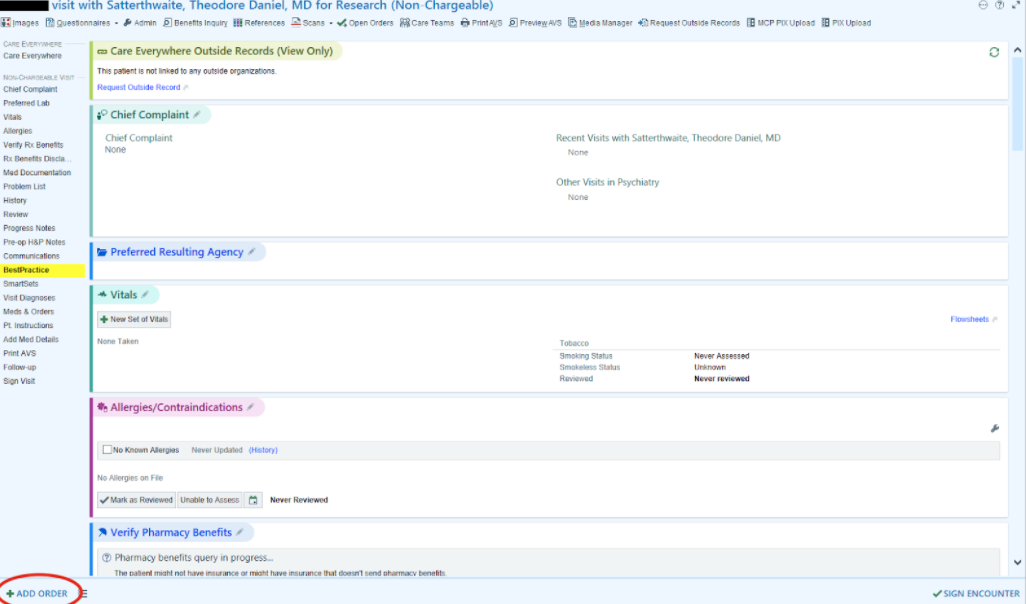
Click the Add Order button in the lower left corner of the screen, and type 70551.
-
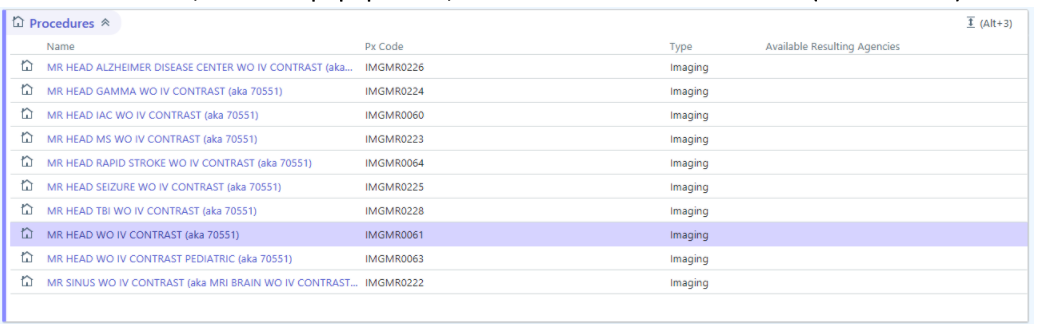
Click Database tab, From the popup menu, select MR Head WO IV Contrast (IMGMR0061).
- Enter the following information in the procedure order popup:
- Pregnant (if applicable): NO
- Pacemaker or ICD: NO
- Metallic or electronic implants or devices: NO
- Expected date: date of MRI
- Reason for exam: type Research
- Storage: leave blank
- Responsible Party: select Personal/Family
- Class: select Radiology
- Priority: select Routine
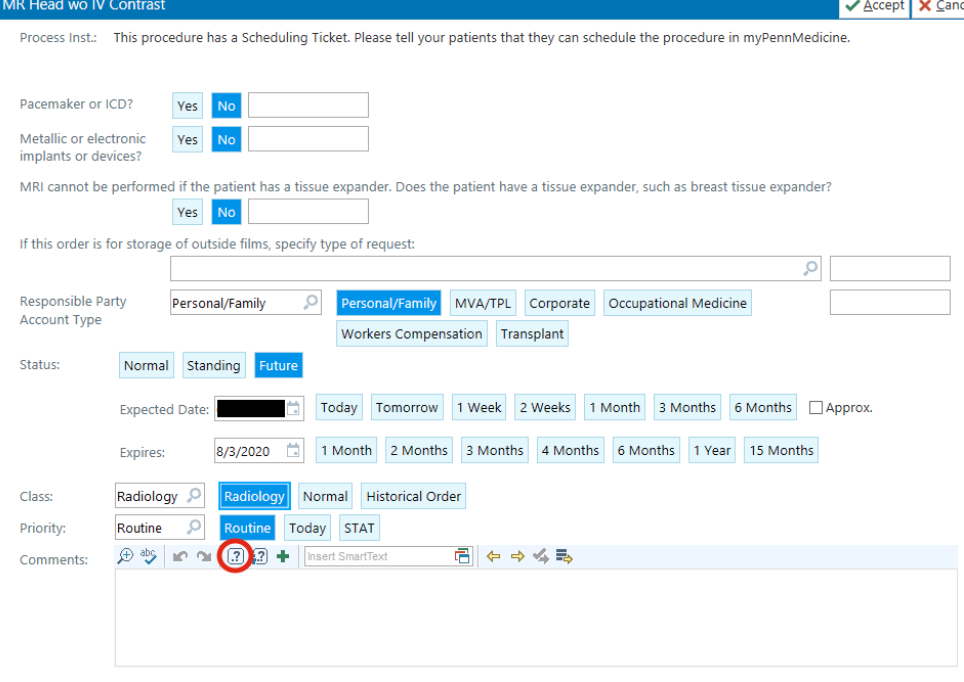
- Enter SmartText into Comments field
- Service Center: CAMRIS
- Billing Code: IRB#
- MRHDUC
- Modifiers: RES, BSA, 265
- Resource Code: HUP6
- Dept:423
- Ordering Physician: [MD listed on encounter]
- CRC Contact: [Study Coordinator and phone number]
- Requested Date of MRI
- Requested Time of MRI
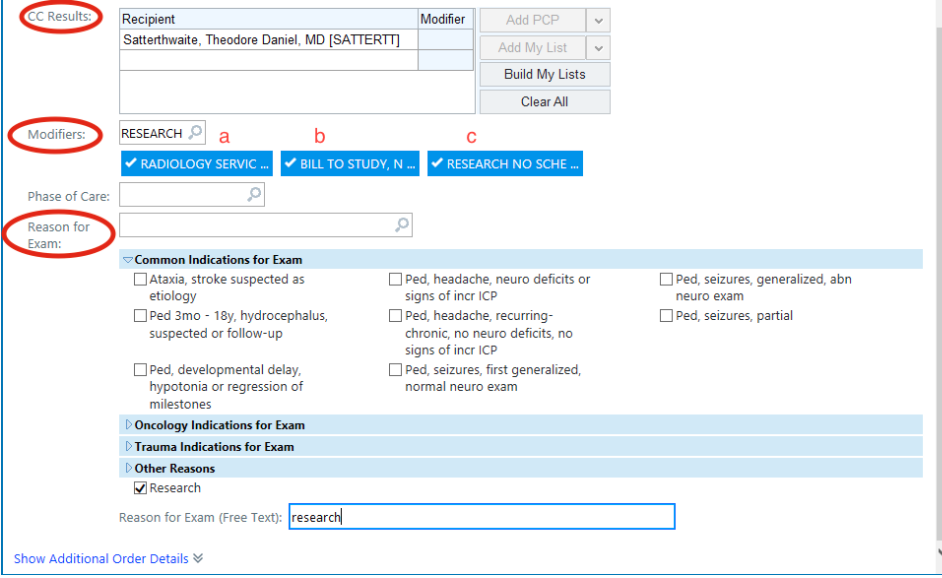
- CC Results to ordering physician
- Add modifiers:
- RES (“Radiology Service Center”)
- BSA (“Bill to Study”)
- 265 (“Research No Scheduling Ticket”)
- Enter “research” in field labeled “Reason for Exam”
- Close out imaging popup
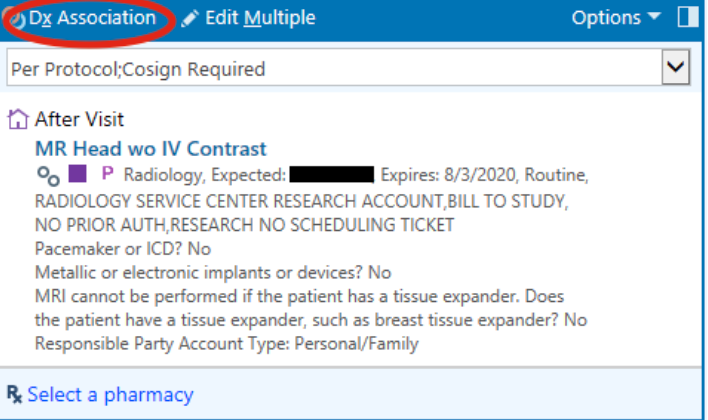
- Associate ICD Diagnosis
- Click on Dx Association in order popup in right-corner
- Click on Dx Association in order popup in right-corner
-
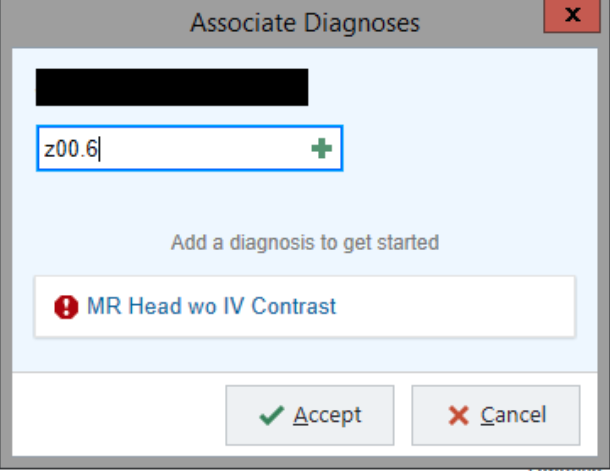
Type in z00.6 to the empty field and select any option from the populated list.
-
Check both boxes to associate dx

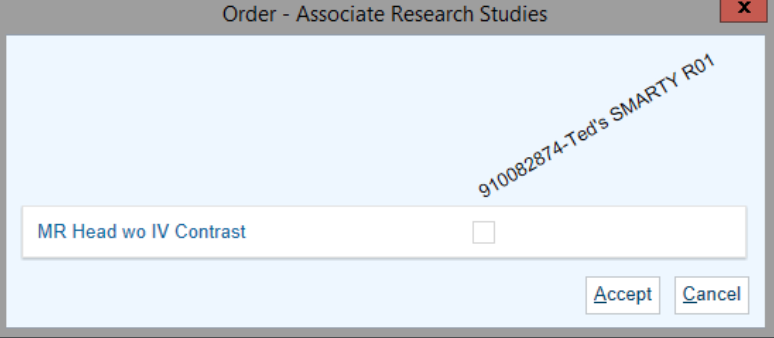
- Associate research study
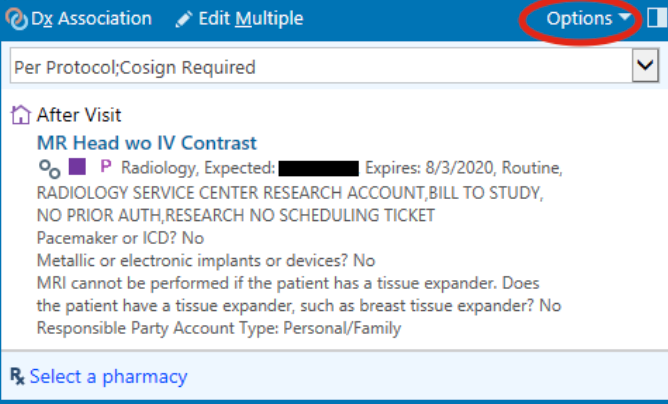
- In the “Options” tab on the order tab, click “Research Association”
- Check box associated with appropriate study and click “accept”
- In the “Options” tab on the order tab, click “Research Association”
- On the left-hand side click “follow up” on the right side fill out PI’s name to route it directly to PI and then click on the unsigned order again and select “pend order”
- After selecting “pend order”, go to “Research” tab and click “Link encounter”
- Email Ted letting them know there is an order waiting to be signed
- Next, go to the order page and copy the order confirmation #, add this # to the “Order #” field on the CAMRIS calendar and the appointment should go from light to dark green
to be updated
Radiology Scheduling
- Call 215-662-3000, type 1
- Say “I’d like to schedule an MRI for research”
- Provide patient: (a) MRN, (b) Date of Birth, (c) height/weight Note: participant MRN’s can be found on Saturn, titled “MRN2020NEW_3” (Saturn/Coordinators/Protocols/TED_PROTOCOLS/EXECUTIVE_829744/NewMRNs) Location: HUP6 (Founders Basement 2, FNDBAMR2), date/time of scan
- Go through medical screener again
- For T1→ ask to put in demographic information and supply information about parents, address, race, ethnicity, preferred language Note: make sure scan is being billed to research
Generating Scan ID
- Log into Oracle and go to “Procedures” on the left-hand side
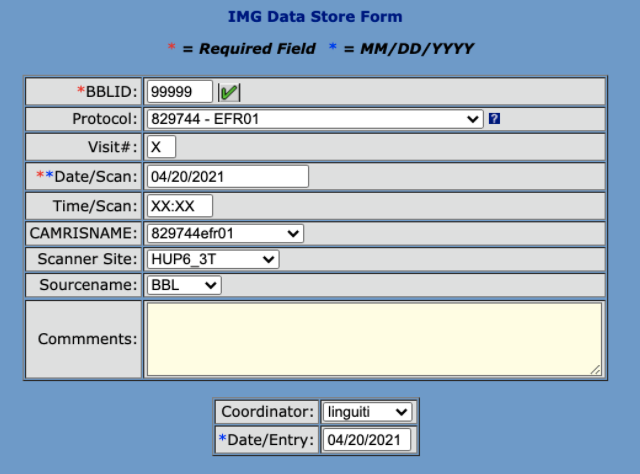
- Select: “Procedure Store” → “IMG Store” and fill out the relevant information (see image below) and click save. Record generated procedure ID.
Note: Visit # will be used to indicate whether scan is @ T1/2/3, for timepoint 1 scan visit #=1
Note: click the green check next to BBLID each time to ensure you are selecting the correct BBL
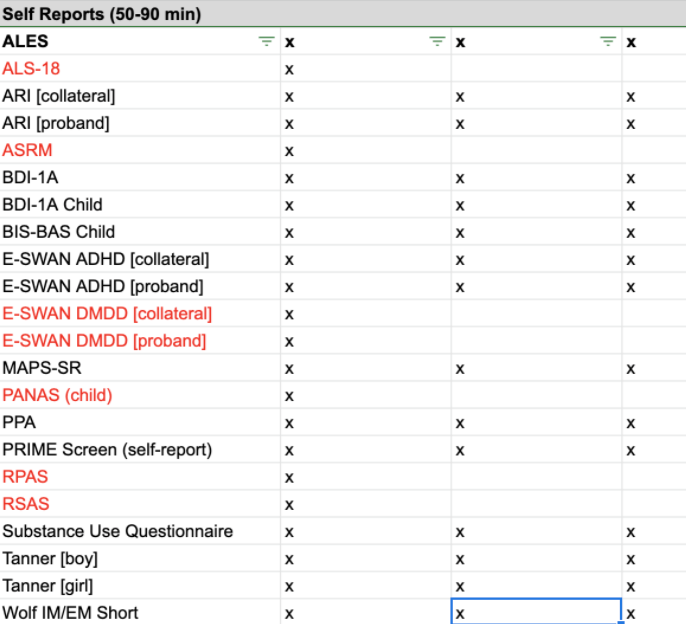
Generating Self-Reports
Note: In order to generate SR scales, they must be enrolled in EF (this should have been completed during intake CAPA, if not, see below for study-enroll procedures) Note: For those over 18, no collateral self-reports are required to be generated or administered For issues troubleshooting Redcap contact Sage Rush or Scott Troyan *Notes on administration in Scan Day section
- Log into Oracle and go to “REDCAP_SELFREPORT” on the left-hand side
-
Select: “Subject SelfR Store” and fill out relevant information (see image below)

- If there is a collateral tied to the subject (and collateral scales) you will enter the collateral ID that is autogenerated on this page at the bottom of the screen.
- Select enter and you will receive a “SCALEID” and a “REDCapID”.
- You can use either one of these IDs to search for the record in REDCap, further explained below.
- Log into Redcap and go to the self-report scales project (most projects use Common Self-report Scales #collection)
- Click View/Edit record
- Under the Data Search box, search for scale session by SCALEID or REDCapID
- Fill out Scales Admin Page, mark form as complete (you can move through the instruments in REDCap by selecting “Save and Go to Next Form”
- The Scales Survey Admin page is for if you want to skip certain scales (e.g., for time constraints), mark complete
Folder Preparation
Prepare the following paper copy printouts before the MRI Visit, all of the following documents can be found on Saturn (Saturn/Coordinators/Protocols/TED_PROTOCOLS/EXECUTIVE_829744/subjectfolder)
- Admin Folder: C2 Form, W9 Form, Clincard, CNB Notes Sheet (LiBI/Executive)
- MRI Folder: MRI Screener, MRI Session Record