Interfacing with the clusters
Prerequisite
You will need ssh Keys set up, a PMACS or CUBIC account (with VPN).
General Principles & Motivation
- We want to code interactively with zero lag in a format that encourages documenting your code
- We want the software and data we are using to be on the cluster, preventing version issues or having to download a test set to your local machine
- We want it to cooperate with all of CUBIC’s nuances
- We want it to be easy!
This means we are going to not use X11 at all. Why? Because running graphics on the cluster, and then having them sent to your local screen, is very laggy and not dependable.
Code Server
There are many viable IDEs for interactive coding, and a very popular/accessible one is VSCode. It’s packed with features, plugins, and themes that make writing code fun and easy. Internally, it’s a nodejs app written in React and runs on Chrome, which technically means it’s a server. Indeed, a group called Coder have already developed and released the application for just the backend server, that users can easily run as an app on their machine and send the pretty graphics to a browser themselves. That’s what we’re going to do here using singularity and SSH port forwarding.
Why not just use VSCode Remote?
VSCode-Remote is VSCode’s built-in shipped method for working on remote servers. It’s well documented, and works just fine as is, but our setup on CUBIC makes it challenging to use VSCode remote. The main issue is that the remote server it runs can only have access to the first user who logs in, which is not how CUBIC’s project user setup works. You end up with a VSCode running from your personal user trying to modify and write files or submit jobs for a project user. We’ve tried setting up jump hosts, proxy commands, and brute forcing a user change with RemoteCommand – none of the methods worked on CUBIC. Code Server is our next best bet.
Installation
Before doing any installation or running any singularity image, please make sure you are using as a project user:
sudo -u <project_username> sudosh
First, we’re going to install the necessary requirements for running the app. So go ahead and log in to CUBIC/PMACS and head to an appropriate project directory (yes, this works for multiple CUBIC project users) or your user directory.
First, you’ll want to install Node using NVM (Node Version Manager). I’d suggest creating a software directory to manage all of this, and download the installation of NVM:
# make sure bashrc is writable
cd ~
chmod +w .bashrc

mkdir ~/software && wget -qO- https://raw.githubusercontent.com/nvm-sh/nvm/v0.39.1/install.sh | bash
This post script ensures it’s available; copy-paste and run:
export NVM_DIR="$HOME/.nvm"
[ -s "$NVM_DIR/nvm.sh" ] && \. "$NVM_DIR/nvm.sh"  # This loads nvm
[ -s "$NVM_DIR/bash_completion" ] && \. "$NVM_DIR/bash_completion"  # This loads nvm bash_completion
Lastly, exit and re-login to the terminal, and check everything went well with:
nvm -v
Next, install Node version 16 (the version is important):
nvm install --lts # install node
nvm install 16    # version number updated on 11/7/22

node -v           # check the version
From here, you can install the underlying code-server application:
npm install -g code-server --unsafe-perm # unsafe is necessary on CUBIC for permissions reasons
If there is error message from above command, try these instead:
npm install -g yarn
yarn add code-server
At this point, you’re ready to run code-server, but you can only do it as a service, and for that we use singularity. Let’s set up the necessary singularity image.
mkdir -p ~/software/singularity_images && cd ~/software/singularity_images
singularity pull docker://codercom/code-server
That’s it! You’re ready to code with code-server.
Basic Use of Code Server
You can take a look at the options available for code-server really quickly with singularity exec:
singularity exec ~/software/singularity_images/code-server_latest.sif code-server -h
What we want to do is start a singularity instance to run the service, and then execute the app in that instance. You also want to make sure code-server has access to things like CUBIC’s tempdir:
singularity instance start \
    --bind $PWD,$TMPDIR \
    ~/software/singularity_images/code-server_latest.sif \
    my-vscode # You can name the instance anything you want
You can name the instance anything you want; if you’re working in a CUBIC project directory with multiple users, you can log in to the project user and name your instance with your own name to differentiate it from other users. You can always check what singularity instances are running with singularity instance list.
Now, in that instance, start running code-server:
PORT=8767

singularity exec \
    --bind $PWD,$TMPDIR \
    instance://my-vscode \
    code-server \
    --port $PORT &         # use & so you can run in the background and continue using the shell

# expect a printout with node runtime
The PORT argument is important; it must be a number of 4-5 digits that is unique to you. The reason being that this is the “channel” that your local machine will use to send inputs and outputs back and forth to the running singularity instance. So pick one number, and stick with it.
Lastly, open a new terminal window to manage the PORT and link it with the same number:
ssh -L localhost:8767:localhost:8767 <username>@CUBIC-sattertt    # change <username> to your CUBIC username

# this process must remain running so don't `ctrl`+`c` it until you're done working
Now, in your web browser locally, visit localhost:YOURPORT (in this example, localhost:8767). If you see this screen, you’re in business:
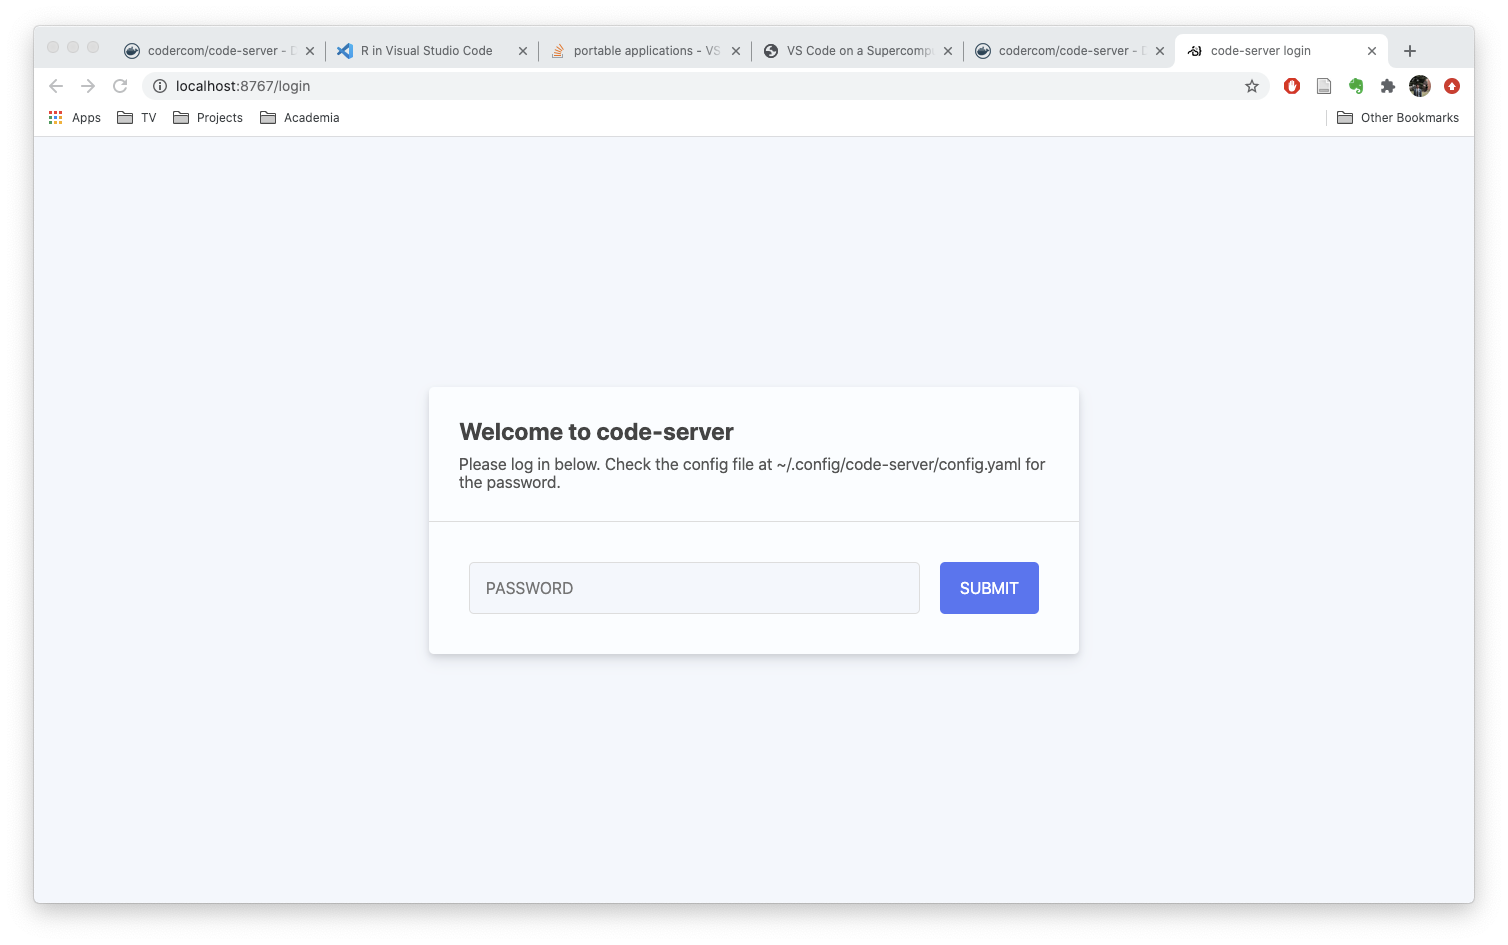
To login, go back to your terminal and find the password in the config file and input:
# please first make sure you have logged in as CUBIC project user, instead of personal user (as the config.yaml is saved in project user folder):
# sudo -u <project_username> sudosh

cat ~/.config/code-server/config.yaml
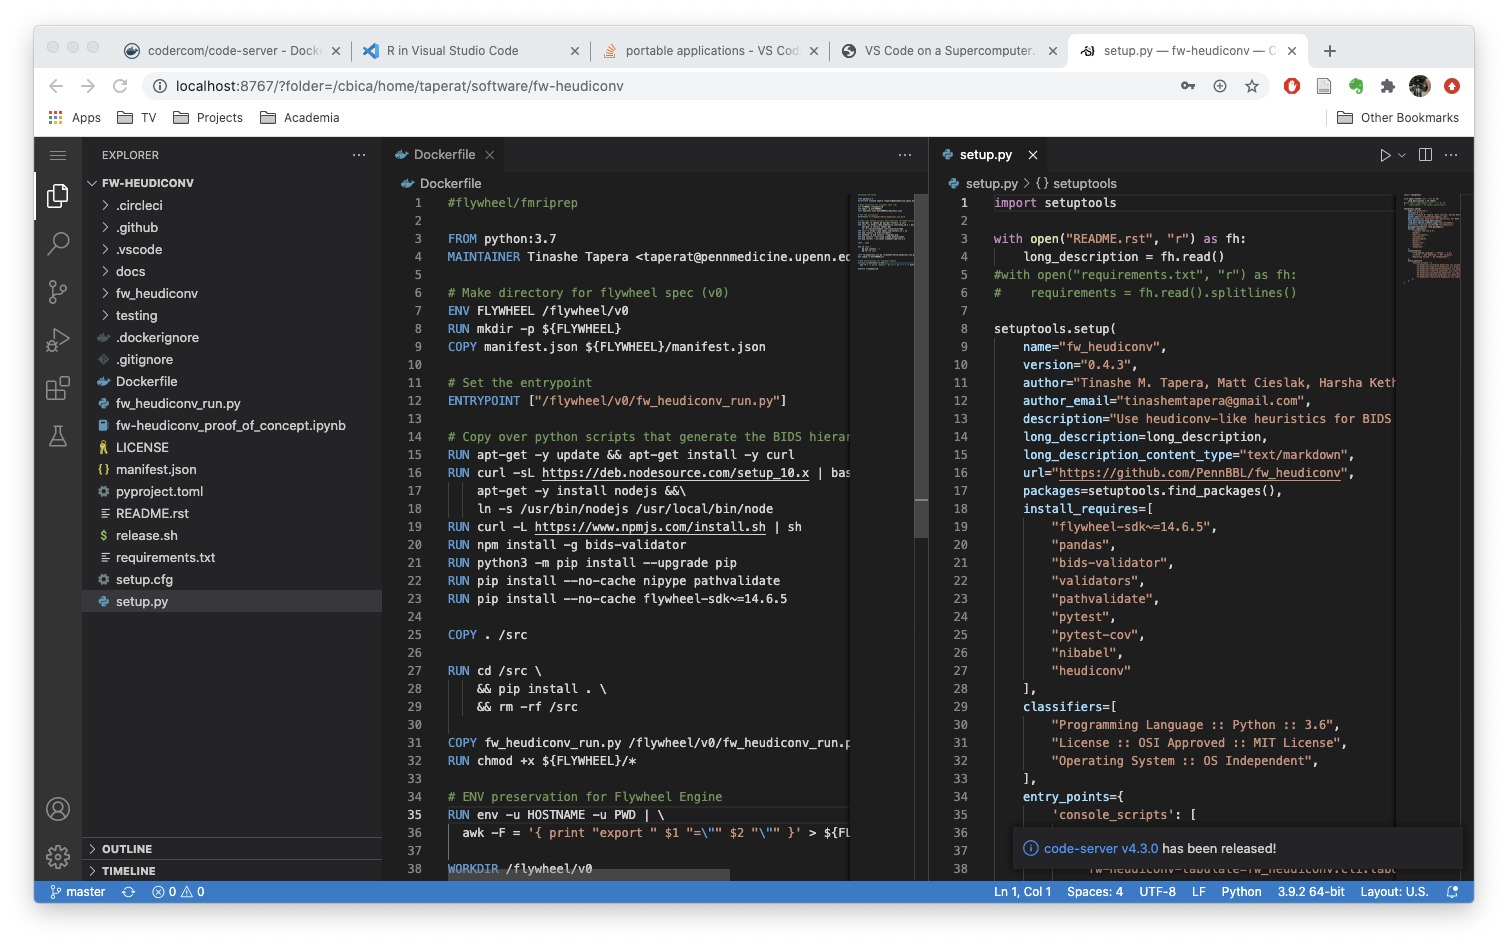
Here we are, editing code on CUBIC with the beautiful VSCode IDE:
Let’s confirm that you are a project user (instead of using your personal account): Open a terminal (click icon at the corner of top left -> Terminal –> New Terminal), type whoami. You should see the project user name, instead of your personal username. This is very important - otherwise, you’re editing the files using your personal account, and creating potential permission issues.
code-server is almost exactly VSCode, so if you want to make the most of this powerful IDE, visit their intro guide.
Caveats & Limitations
VSCode has a great interface for git, but will struggle to manage a very large directory that’s tracked by git; be prepared for it to notify you if you, for example, open a BIDS directory tracked with datalad
The integrated terminal is a shell opened by Singularity, so it does not source your
bashrc/bash_profile. This means some of your installed command line programs may not be accessible. Keep your normal terminal open alongside yourcode-serverGUI for best practices.All users in a project share the same
~/.config/code-server/config.yaml, so the password is not unique by default. It is possible to deactivate authentication when you start the server with--auth none, and it’s also possible to point to a specific config file with--configthat you could use to keep your own password (untested).Similarly, with VSCode extensions, it’s recommended to store your extensions in a specific directory if you expect to share the project directory. You can then point to it with
--user-data-dirand--extensions-dir. This is arguably less seamless than VSCode-Remote functionality, but we believe this is a better workaround because VSCode-Remote is not fully functional in our case.
Speaking of extensions…
Basic extensions
Max put together a great list of extensions here; check them out and install them with the Extensions Tab.
For example, with VSPapaya, you can open NIfTIs and DICOMs:

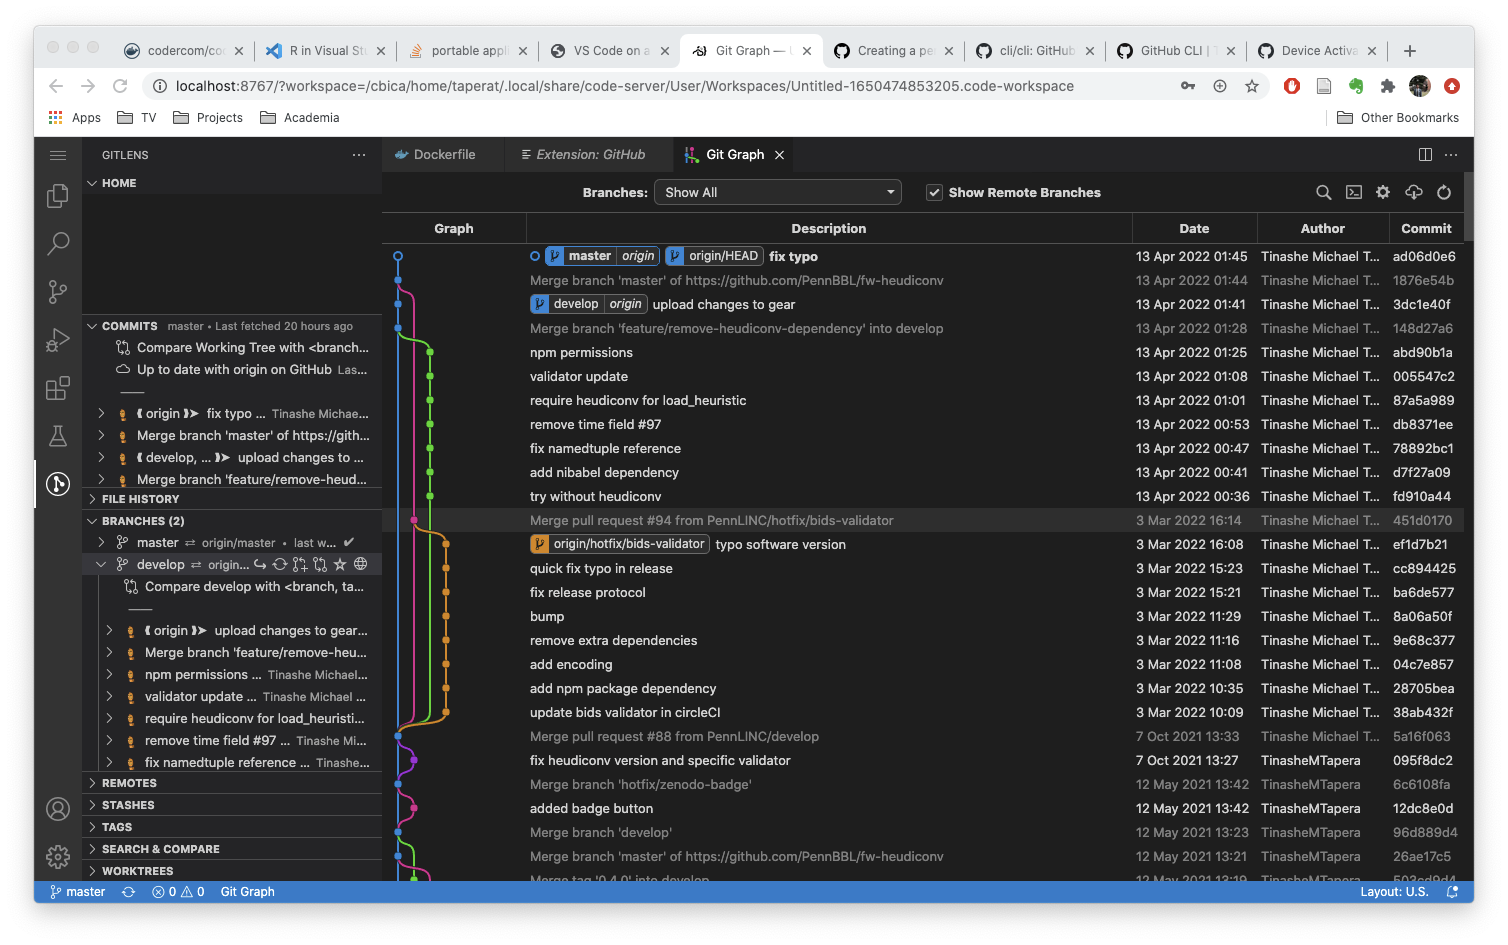
You get great integration with Git using the Git Extension pack
The most important extension though is how to enable interactive, REPL style programming for active debugging and data analysis. We do this with conda.
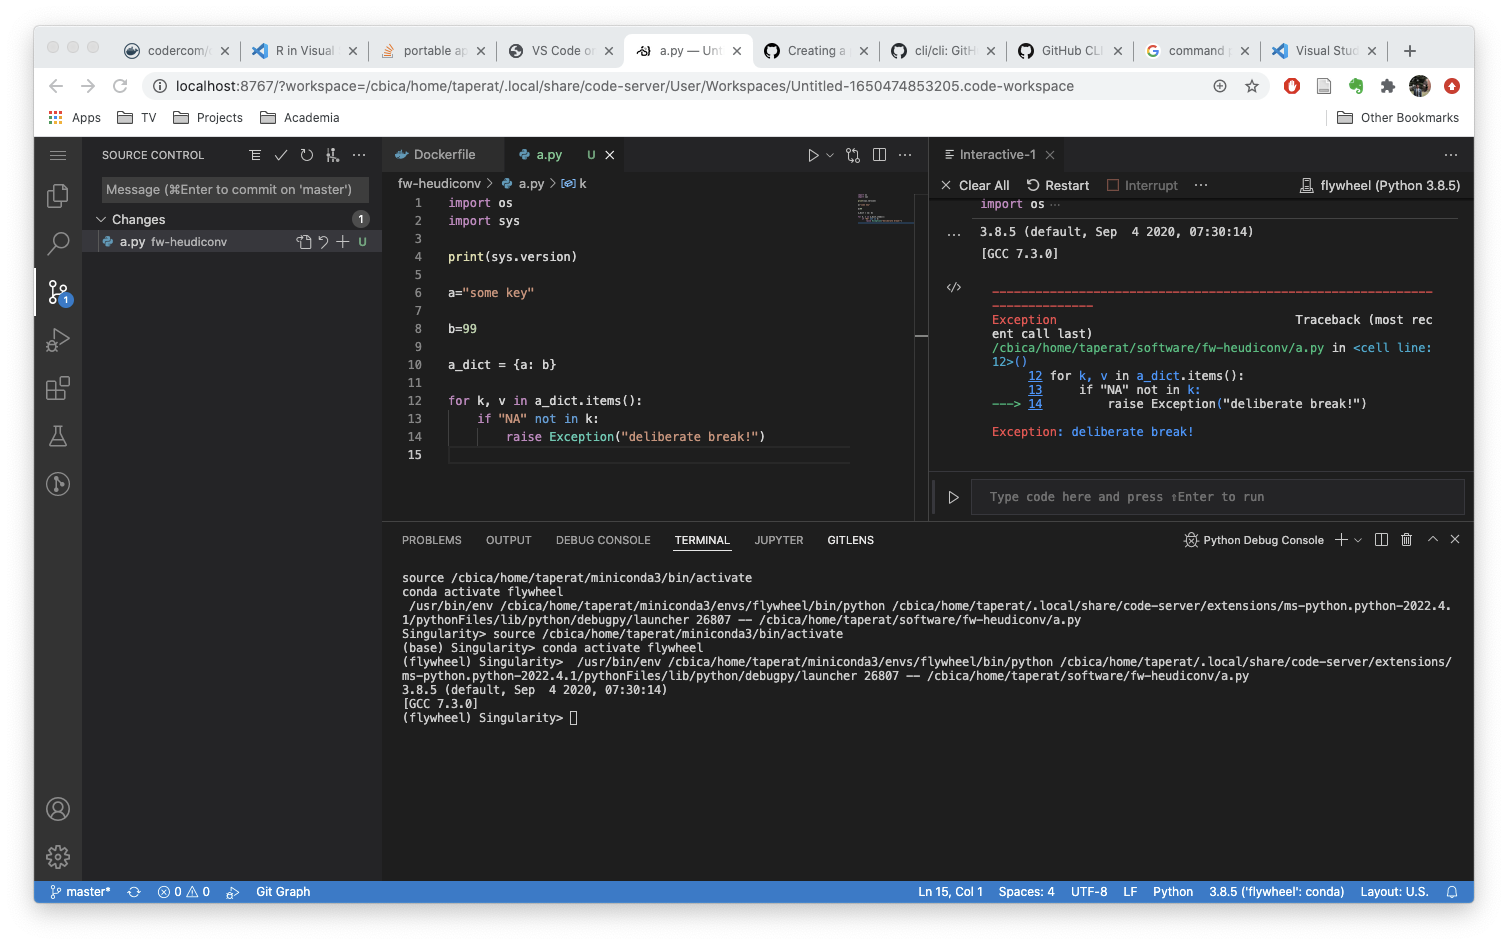
REPL (Interactive Programming)
You can code in Jupyter Notebooks right in code-server. First, ensure that you have a conda environment setup. Once you’re ready, start up your code-server and make sure the Jupyter extension is installed. Use the command palette (cmd+shift+p) to search for Jupyter interpreters.

In the command palette, simply type interpreter, and select “Jupyter: Select interpreter to start Jupyter server”.
If you have conda set up correctly, your code-server should begin listing what conda environments you have and the different versions of Python that are available. Once you’ve picked one, you can then run/debug a Python file in a Jupyter kernel, debug files with the built-in debugger, develop Jupyter notebooks, etc.
Closing the Server
If you disconnect from CUBIC unexpectedly, the process running code-server (the singularity exec) will be killed, so actively running Jupyter kernels will be lost. Generally, though, if the singularity instance service is still running, unsaved files can still be recovered (always save your work though, of course). To stop the server, find the process within the singularity instance, and kill it:
singularity exec instance://my-vscode ps -x

##   PID TTY      STAT   TIME COMMAND
##     1 ?        Sl     0:00 sinit
##    16 pts/112  Sl+    0:01 /usr/lib/code-server/lib/node /usr/lib/code-server --port 8767
##    40 pts/112  Sl+    0:38 /usr/lib/code-server/lib/node /usr/lib/code-server --port 8767
##    52 pts/112  Sl+    0:00 /usr/lib/code-server/lib/node /usr/lib/code-server/lib/vscode/out/bootstrap-fork --type=ptyHost
##   700 pts/112  Sl+    0:11 /usr/lib/code-server/lib/node /usr/lib/code-server/lib/vscode/out/bootstrap-fork --type=extensionHost --uriTrans
##   711 pts/112  Sl+    0:00 /usr/lib/code-server/lib/node /usr/lib/code-server/lib/vscode/out/bootstrap-fork --type=fileWatcher
##   874 pts/112  Sl+    0:00 /cbica/home/taperat/miniconda3/envs/flywheel/bin/python /cbica/home/taperat/.local/share/code-server/extensions/
##   886 pts/112  S+     0:00 /cbica/home/taperat/miniconda3/bin/python /cbica/home/taperat/.local/share/code-server/extensions/ms-python.pyth
##   914 pts/117  Ss     0:00 /bin/bash
##  1063 pts/117  S+     0:00 /cbica/home/taperat/miniconda3/envs/flywheel/bin/python
##  1151 pts/112  R+     0:00 /bin/ps -x

singularity exec instance://my-vscode kill 16 # kill the node code-server process
If you are happy with your work and your project, and don’t plan to come back to it for a while, make sure to kill the singularity instance to free up compute resources
singularity instance stop my-vscode
Conclusion
We encourage you to try out interactive programming with code-server. It’s a great tool for data science that we hope you’ll take advantage of and customize for your work. If you have any trouble running it, improvements to suggest, or want to share a cool workflow or extension, please do so on the slack informatics channel or in our issues page. Many thanks to this blog for demonstrating this first.