| Title | Author | Replicator | Goal | Input Data | Output |
|---|---|---|---|---|---|
| Curating ASL Data | Tinashe Tapera | TBD | Prepare ASL Data for ASLPrep | ASL DICOMs | BIDS Valid ASL Data |
Introduction
ASL is one of the latest imaging modalities to join the BIDS family. It stands for Arterial Spin Labeling, and is a great measure of cerebral blood flow (CBF). To learn more about the physics of ASL and why it’s valuable, see these resources (1, 2, 3). For now, let’s talk about curating ASL.
One of the difficulties of curating data into BIDS is that much of the information needed for ASL to auto-configure its workflow is not provided by the dcm2niix conversion. We need to harcode a number of parameters into the BIDS sidecars in order for it to pass BIDS validation and be used effectively by preprocessing pipelines. We’ll talk about each of these parameters and where to get them in this tutorial.
Prerequisites:
- VSCode
- ASL DICOMs, obviously
Note that this is not a comprehensive curation tutorial; here, we focus only on the missing pieces of ASL curation that are undocumented. For a comprehensive understanding, see the BIDS spec and the fw-heudiconv docs
ASL Flavours
There are a few different ways to collect perfusion data, resulting in different ASL flavours. These are Continuous Labeling (CASL, which is mostly unused), PseudoContinuous Labeling (PCASL), and Pulsed Labeling (PASL). Unfortunately for us, each of these have different required fields in the BIDS spec, so your first task will be finding out what ASL technique was used at the scanner.
Recall that some fields in a BIDS sidecar are REQUIRED and others are RECOMMENDED. For ASL, this depends on the technique being used. In the following steps, we’ll outline the necessary BIDS fields for each flavour and tell you where to find them. When you’ve found them, simply place them in the JSON side car of the ASL acquisition NIfTIs.
All ASL
ArterialSpinLabelingType
This is just to denote what flavour of ASL we’re dealing with; simply fill in PASL, PCASL, or CASL.
PostLabelingDelay
This one is tricky; after the blood is tagged in the neck, it flows up the neck and into the brain, and only then is the perfusion signal collected. The time between the tagging of blood and the signal collection is called the PostLabelingDelay, noted in seconds. Don’t expect it to be a large number – it should be in the order of a few seconds.
To calculate post labeling delay, we have to open a DICOM. You can simply select and open a DICOM in an editor like VSCode. Ignore any message that insists it can’t open this type of file; it can, as text. Also, ignore the multitude of red highlights – these are just characters that can’t be parsed.
The field we’re looking for is called WIPMEMBLOCK_DVAL_02, and it’s in microseconds. It won’t always be this exact string, but partial matching should get you there. Here it is in VSCode: 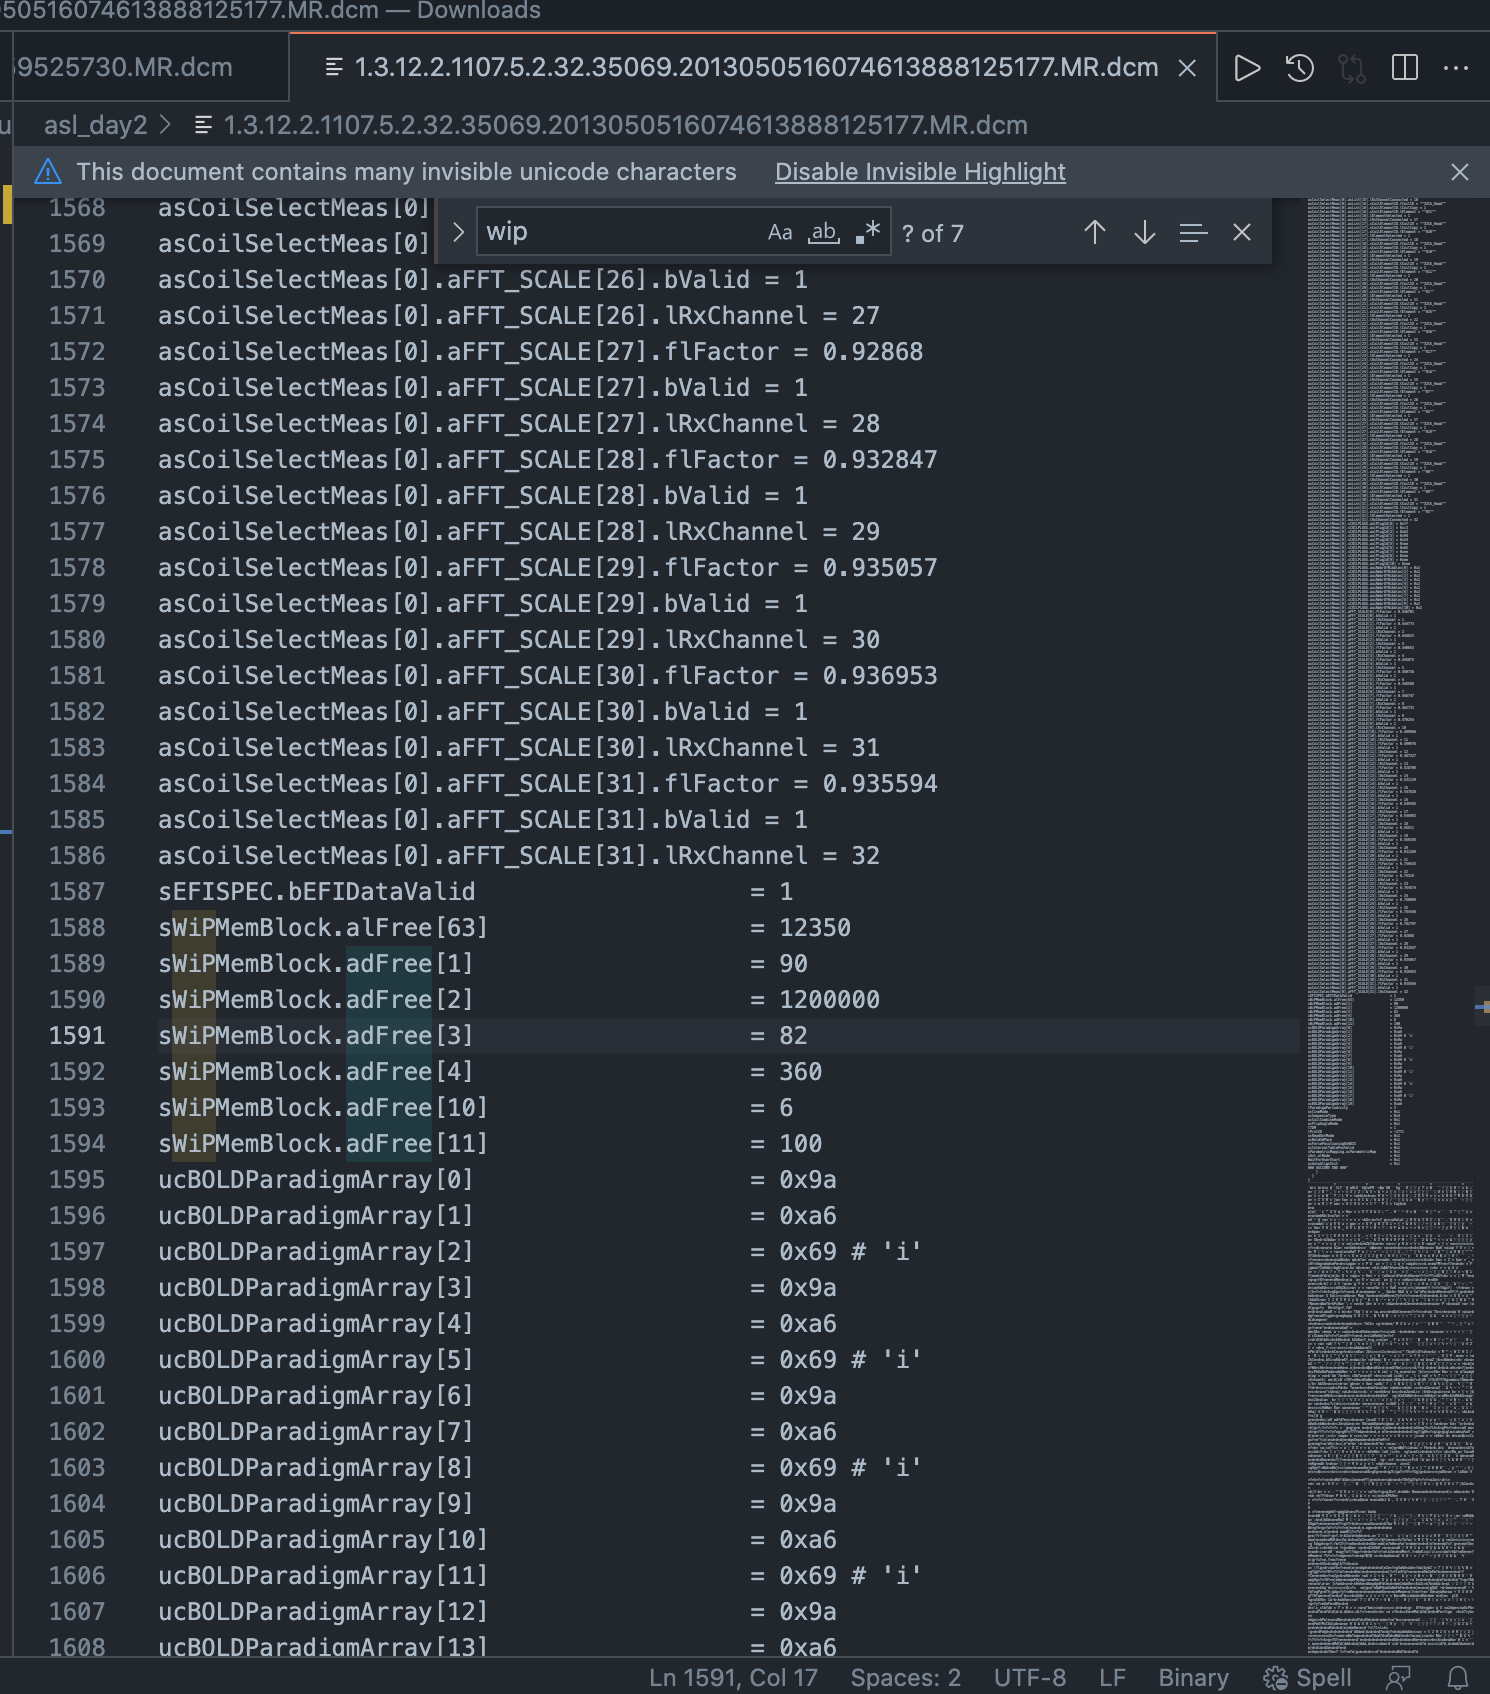
The second value in the array (i.e. DVAL_02) is sWiPMemBlock.adFree[2] = 1200000
Therefore, the post labeling delay in this case was 1.2 seconds.
BackgroundSuppression
Background suppression is important; generally, if you do not have an M0 image (see below), set BackgroundSuppression to True. But check with your MR physicist on what’s the best setting here.
M0Type
An M0 image is used as a reference image and to estimate the equilibrium magnetization (M0) of blood. If an M0 scan is not provided, the average of the control images is used as the reference (while checking for background suppression).
The field is therefore dependent on your scan sequence; if M0 is included it can be taken as a separate image or can be the first image in the ASL time series. If you don’t know, view the DICOM in Flywheel or your image viewer of choice – the M0 image has higher intensity and contrast compared to the rest of the time series.
Once you know, simply use one of the following in the JSON sidecar: Separate, meaning you have a separate M0 nifti; Included, meaning it’s one of the volumes in the ASL time series; or Absent, if you have no M0 scan.
TotalAcquiredPairs
This is a count of the volumes in the time series, divided by two. If your time series is not divisible by two, one of the volumes may be an M0 scan. This entry is a plain integer.
PCASL
LabelingDuration
PCASL will also require the LabelingDuration. It’s a calculated value for the series, so open up VSCode again and open one of the DICOMS.
Generally, check with your MR physicist on how to calculate the LabelingDuration. It can vary by sequence and by scanner type, and the sequences change as the technology develops, so there’s a need for flexibility here. For example, for recent 3D sequences at Penn, the labeling time is directly included in the sequence header. The field does not always match, and it’s better to have a look at the text file to make sure you are picking the right number. There will be two numbers with values close to each other next to 1.8, the first one is the labeling time and the next one is the PLD.
RepetitionTimePreparation
This is required, but it’s unlikely to ever be different from the regular TR. So just set this to the same value as the RepetitionTime.
Conclusion
ASL data curation is tricky and not always straight forward like other data curation. You should try and get a hold of the MR physicist or technician who ran the scan and ask them to share the sequence parameters. Better yet, once you’ve completed curation, be sure to ask them to look it over.
Additional resources: