Uploading To Flywheel
There are several ways to get your data onto flywheel. Which one you should use will depend on the type and quantity of data you are uploading.
1. The Graphical User Interface (GUI), a.k.a. the website: This is best to use only when you are uploading small files, such as attachments and logs, to individual projects, subejcts, sessions, or acquisitions.
2. The Command Line Interface: This is the most flexible way to upload your data. There are several commands that you can use and tailor to your particular use case. You can find the documentation here: https://docs.flywheel.io/hc/en-us
3. Using the Custom Info Uploader Script: If you have a csv of data you need to upload to individual subjects, this tool will allow you to do it in one command.
4. Using the Self-Report Score and Upload Gear: This is a flywheel gear that takes in a custom scoring code, and a csv of raw scale data, and then applies that scoring code to the raw data and attaches each subject’s scores to their custom info on Flywheel.
Way 1: Using the GUI
Uploading a file at the project, subject, and session levels:
The procedure for uploading to these levels is nearly identical, so we’ll use the project level as an example.
Step 1: Go to any subject in the project of interest, and navigate to the project tab. 
Step 2: Scroll down until you see the Attachments, and click on “Upload Attachment”. 
Step 3: Then, you should see this window prompting you to drag the file to upload. Do so, and the file should upload automatically. Click close when you’re done. 
This same procedure can be done at the subject and session levels by clicking on the appropriate tab.
Uploading a file at the acquisition level:
Step 1: Navigate to the Acquisitions tab. Then scroll down to the acquisiton you’d like to upload to, and click on the rightmost three vertical buttons as seen below. 
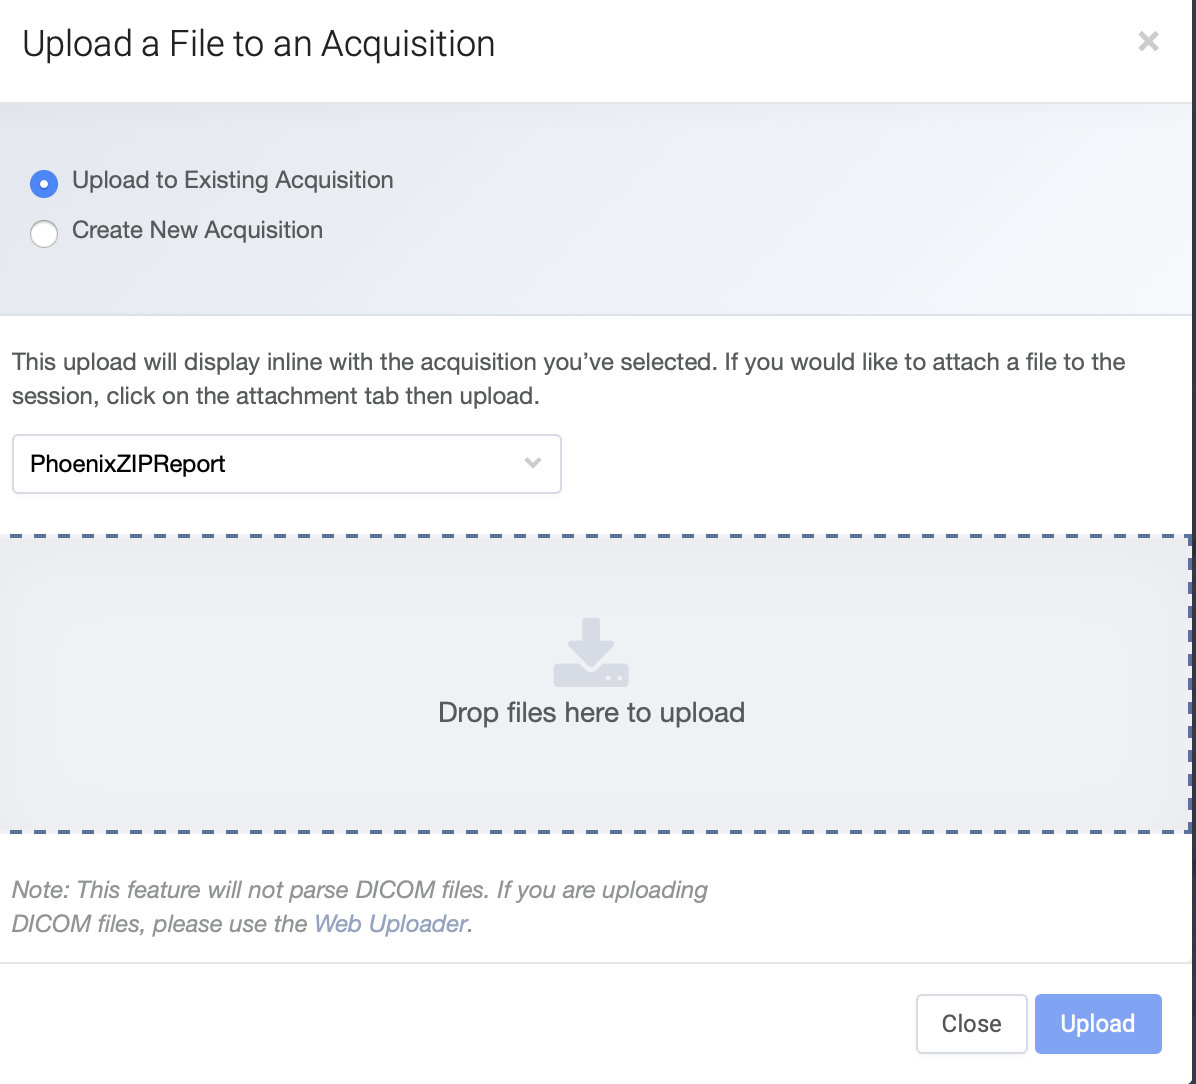
Step 2: Select “Upload Data To Acquisition”, and drag the file to the box prompting you to upload. 
Step 3: Click on “Upload” when you’re done.
Way 2: Using the CLI
For instruction for installing the CLI, the different commands to upload, and when best to use them, see Flywheel’s CLI documentation here: https://docs.flywheel.io/hc/en-us
Way 3: Using the Custom Info Uploader Script
This script takes as input a CSV file with the following characteristics:
- No Protected Health Information (PHI) in the file
- All columns are named
- The subject ID column is named “bblid”
It then organizes the data into dictionaries and uploads it to each subject’s Custom Info field on flywheel. The script can be called in the terminal by doing:
python customInfoUploader.py -d path/to/CSV -p name_of_project -n dict_name
For example, to upload data in a csv called “flavortown.csv” to my “GUY_FIERI” project on flywheel as a custom field called “recipes” I would do:
python customInfoUploader.py -d flavortown.csv -p GUY_FIERI -n recipes
NOTE: Prior to uploading, please sign into a flywheel session in your environment. See here for instructions: https://flywheel-io.github.io/core/branches/master/python/getting_started.html
See below for the script. You can also find it here: https://github.com/PennLINC/grmpy/blob/master/miscellaneous/customInfoUploader.py
#####################################################################################
####                           Custom Info Uploader                              ####
####                           By: Diego G. Dávila                               ####
####                            Satterthwaite Lab                                ####
####               University of Pennsylvania School of Medicine                 ####
#####################################################################################
#
# This script takes as input a CSV file with the following characteristics:
# 1. No Protected Health Information (PHI) in the file
# 2. All columns are named
# 3. The subject ID column is named "bblid"
#
# It then organizes the data into dictionaries, and uploads it to each subject's Custom Info field on flywheel.
#
# The script can be called in the terminal by doing: python customInfoUploader.py -d path/to/CSV -p name_of_project -n dict_name
#
# *NOTE: Prior to uploading, please sign into a flywheel session in your environment. See here for instructions: https://flywheel-io.github.io/core/branches/master/python/getting_started.html


import sys
import csv
import numpy as np
import pandas as pd
import os
import argparse
import math


# Set up argument parsing for the required inputs
parser = argparse.ArgumentParser()
parser.add_argument('-d', '--data', required = True) # the csv containing data
parser.add_argument('-p', '--project', required = True) # the name of the project you're uploading to
parser.add_argument('-n', '--name', required = True) # the desired name for the dictionary
inputs = parser.parse_args()

# Feed in the user inputs
path2data = inputs.data
project = inputs.project
name = inputs.name

# Read in the data
customData = pd.read_csv(path2data)

#turn the bblid field into string
customData.bblid = customData.bblid.astype('str')

# make the bblid column the index
customData.set_index('bblid', inplace=True)

# Turn the scored data.frame into a dictionary
fullDict = customData.to_dict(orient = 'index')

# Loop thorugh the newly created dictionary, and nest all the fields in their own dictionary for each subject
for x in fullDict:
    fullDict[x] = {'{}'.format(name): fullDict[x]}

# Replace NAs - uploading NAs to flywheel interferes with the GUI and makes objects not visible. This function replaces them with None, which flywheel should be able to handle.
def iter_replace_dict_nans(input_dict):
    for key, value in input_dict.items():
        if isinstance(value, dict):
            iter_replace_dict_nans(value)
        elif value != value:
            input_dict[key] = None
iter_replace_dict_nans(fullDict)


## Attach To Each Subject On Flywheel ##
# Create an instance of flywheel and containers for sessions and subjects
import flywheel
projname = '{}'.format(project)
fw = flywheel.Client()
projectContainer = fw.projects.find("label={}".format(projname))
projectContainer = projectContainer[0]
sessions = projectContainer.sessions()
subjects = projectContainer.subjects()


#Attach the dictionaries to the appropriate session objects
for i in range(len(subjects)):
    bblid = subjects[i].label.lstrip("0") # removes any leading zeros there may be
    if bblid in fullDict:
        try:
            subjects[i].update_info(fullDict[bblid])
        except AssertionError as y:
             logger.setLevel(logging.DEBUG)
             logger.error("Subject not found.")
             logger.error(y)
        print ("Uploading {}'s Info".format(bblid))
    else:
        print('{} was not uploaded because it was not found in the input csv'.format(bblid))
Way 4: Using the Self-Report Score and Upload Gear
This method of uploading has a very specific use case: when you have raw, unscored data, that you want to score and upload to flywheel while keeping track of your scoring code.
Two inputs are required:
- Your scoring code, either in R or Python. It should output a CSV with the following characteristics: No Protected Health Information (PHI) in the file, All columns are named, The subject ID column is named “bblid”.
- Your raw data csv.
These inputs should be attached at the project level.
Once these inputs are uploaded, you can launch the gear from any subject in your project (any subject will do, it will operate on the entire project).
To launch the gear, navigate to a subject, and click the “run gear” button. Select Analysis gear, and scroll down to find “Self Report Score and Upload”.
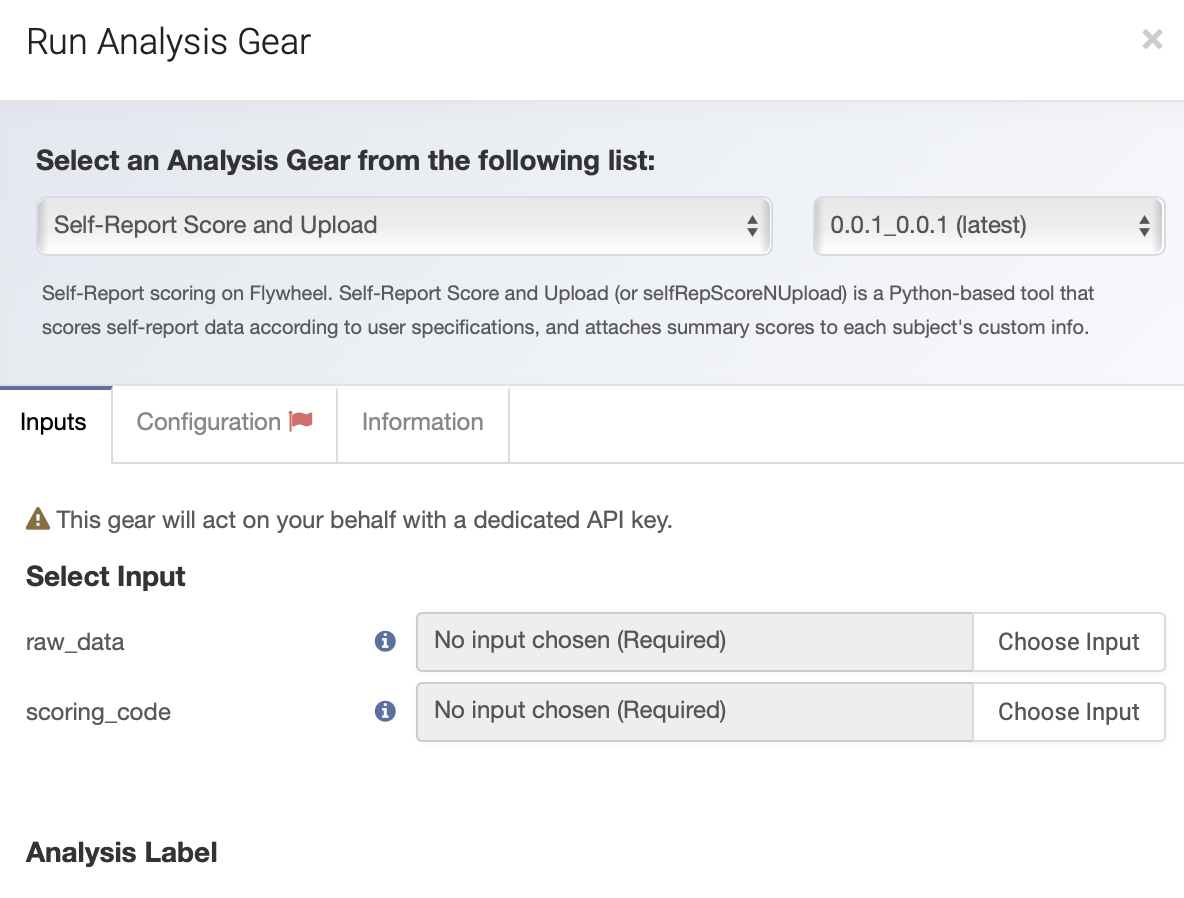
You should then see this screen. Here you select the raw data csv and scoring code from your project attachments. 
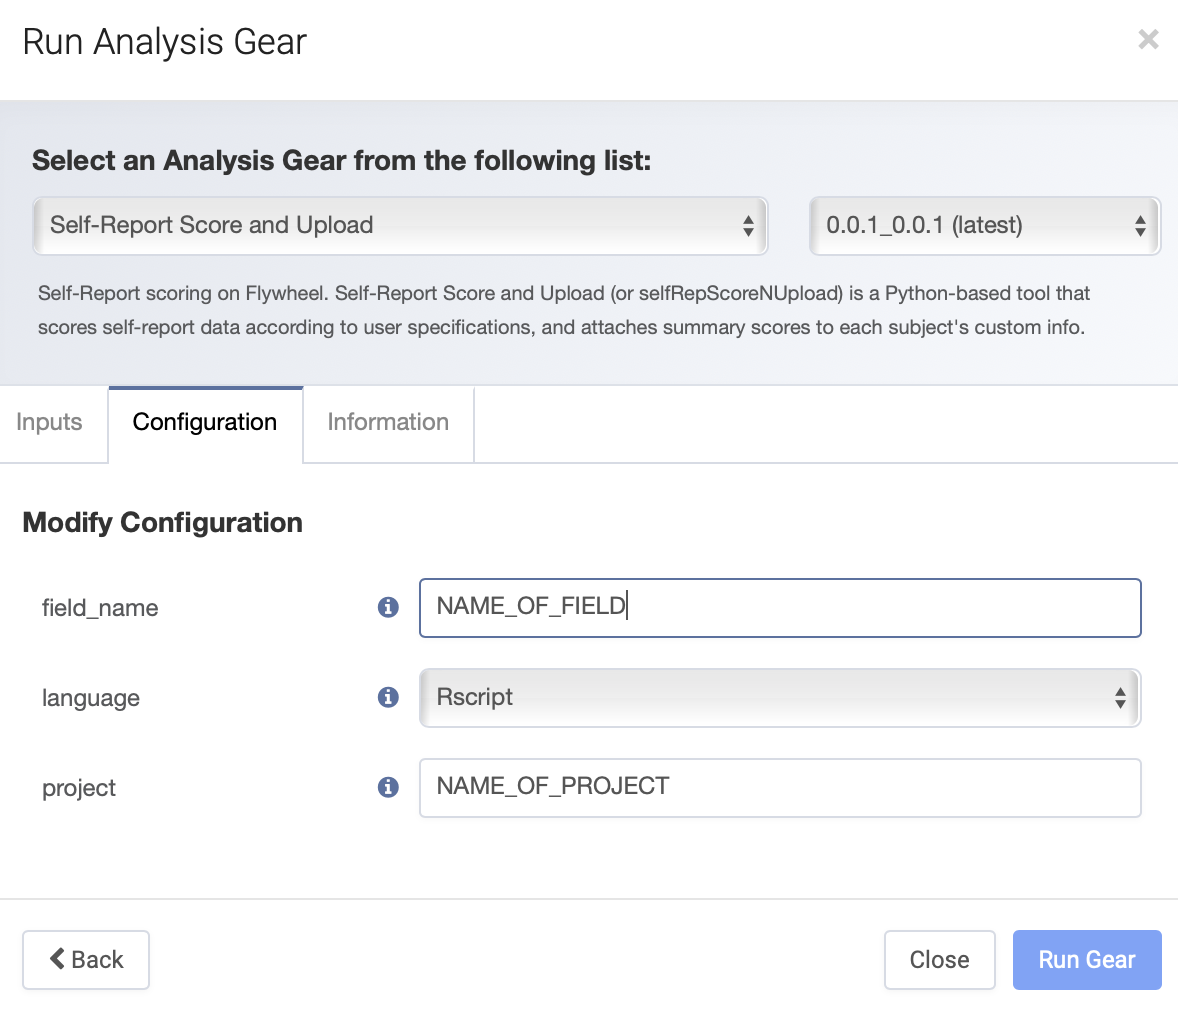
Then select the Configuration tab, and you should see this screen. Type in the name of the custom info field, and the project, and you should be good to go. Make sure to select your scoring code’s correct language. Simply hit Run Gear when you’re done. 